Celebrate fall colors with this super fun, fast and easy art project your kids can create–in just ONE THIRD OF THE TIME!
This art project was inspired by a finger paint project I found on Crayola.com. But I hate finger paint! The mess! Yuck! Besides, my kid is older and we work with brushes. But any kid who can draw a fairly straight line can do this craft–and turn out a painting worth framing. On the fridge, at least.
You will need:
- Construction paper (blue and green)
- Paint (brown, orange, yellow, red)
- Sponge brushes
- Scissors
- Glue
You’ll also need something to protect your work surface, like old paper bags/newspaper and a dish for your paint. We used a paper plate.
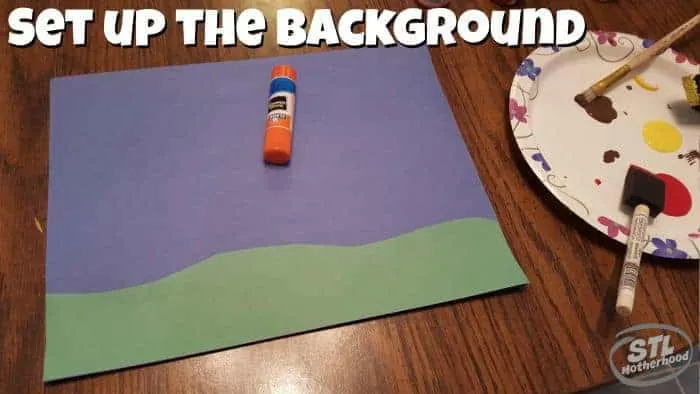
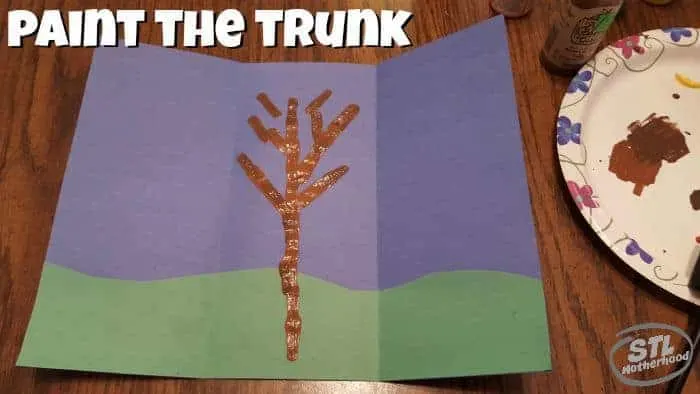
First: Cut a strip of green paper for the ground–make it hilly for more interest! Glue the strip to the bottom of your blue paper.

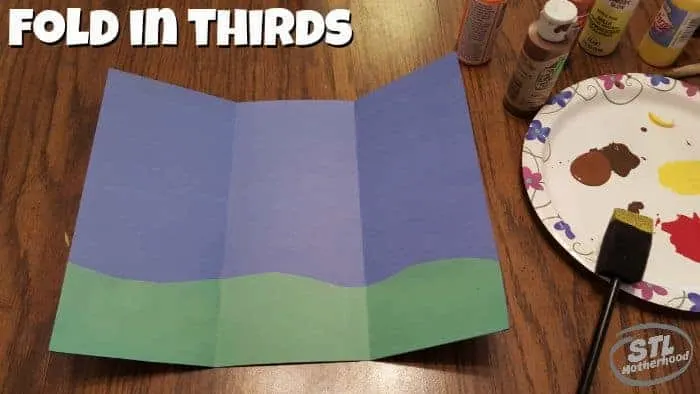
Then: Fold the paper in thirds, vertically.

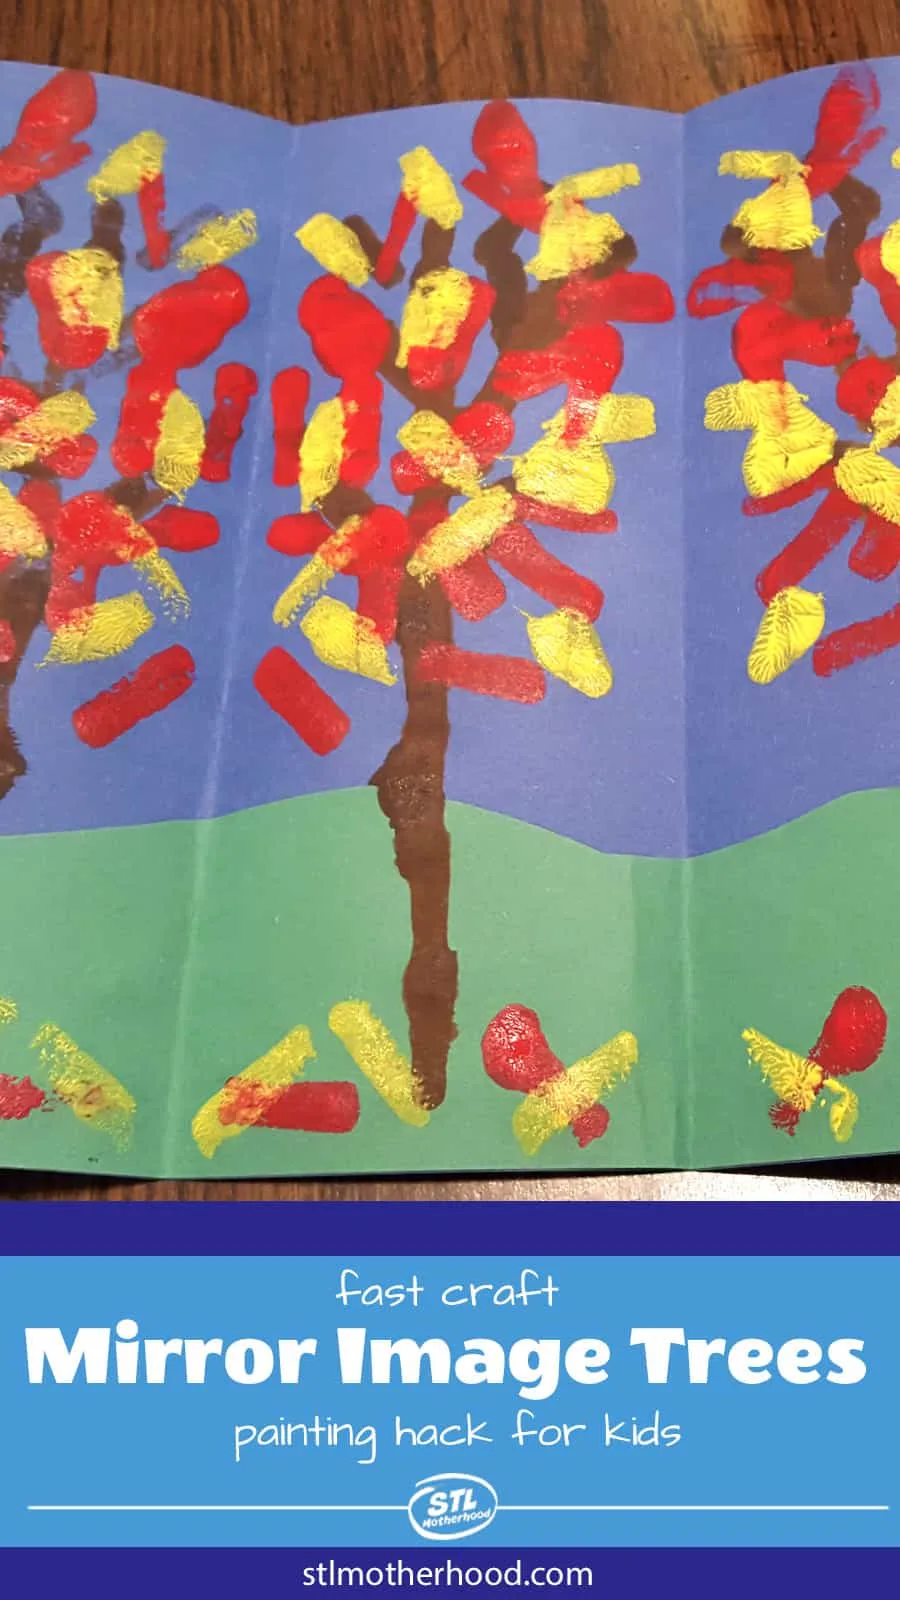
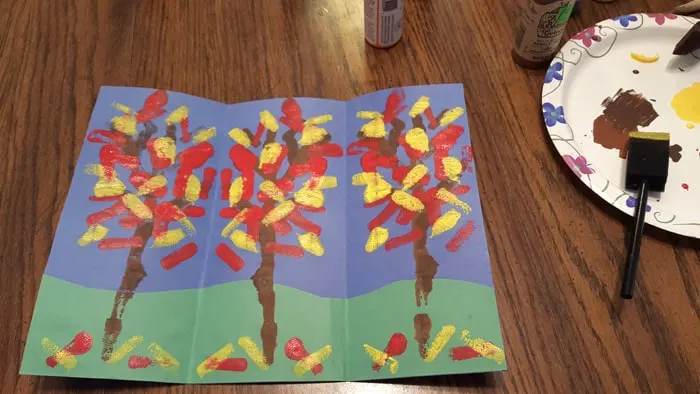
Now Paint! Your artist will start by painting the tree trunk IN THE MIDDLE SECTION OF THE PAPER. Use a sponge brush and really glob on the paint!

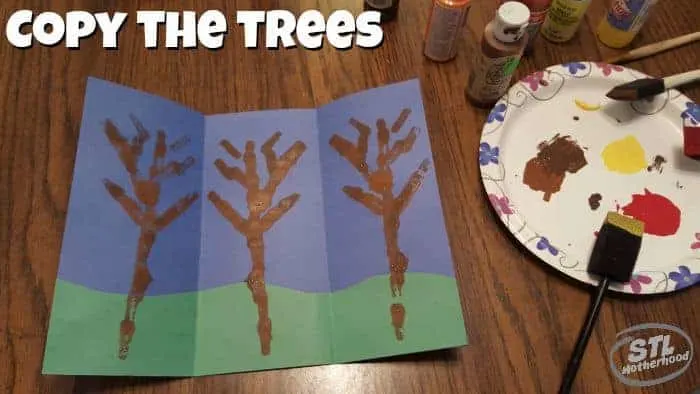
Now here’s where the magic starts! Fold one side over and gently rub the paper, transferring the paint to the fresh section. You only need to rub lightly! Unfold the paper–now you have two trees! Repeat with the other side, but rub a little harder this time. Three trees!!
Now you repeat the process with leaves! Use one color at a time, and paint leaves onto the center tree. Just dab the brush for each leaf, it’s easy! Fold the paper like you did with the tree trunks before moving to the next color.

Wasn’t that fun?
You can switch around the leaf colors (and background) for different seasons. How about a cedar tree with snow for winter? Or a tree with flowers for spring? A green tree for summer! Make a whole year’s worth of trees for your forest!