Do you want to hang a memory on your tree? There’s a lot of great ways to make photo ornaments, but my favorite is the Floating Photo Globe. Let me show you how to make one without any fancy tools or machines.
What is a Floating Photo Ornament?
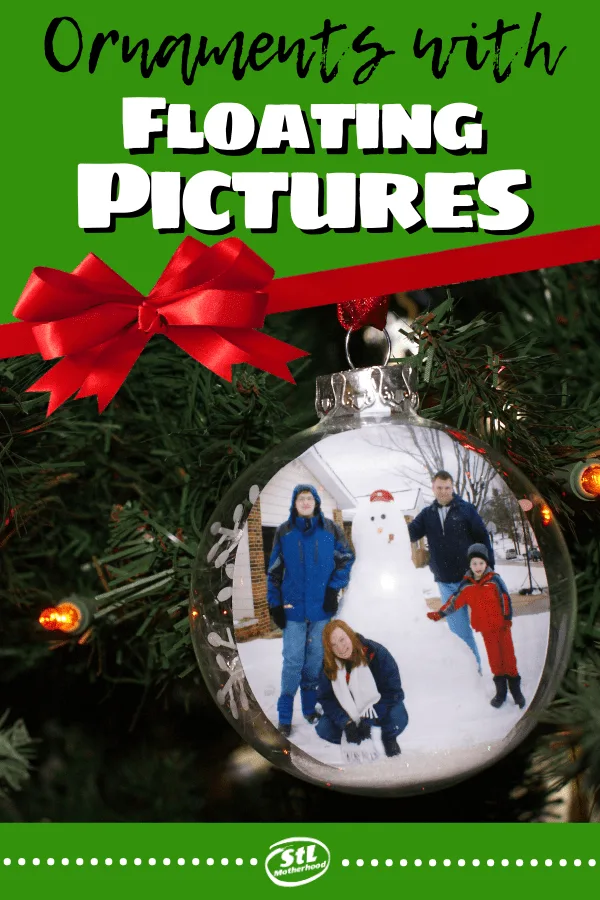
A floating photo ornament has an image — like a family photo — that seems to hover inside a clear ornament like magic!
They’re really simple to make if you know the trick: a piece of clear plastic to suspend the photo in the middle of your ornament!
All you’ll need is a quick run to the craft store to grab some plain glass or plastic ball ornaments, crafting plastic, scissors, double stick tape and photos.
I mean, unless you’re like me and already have a bag of blank ornaments in your closet you didn’t get around to LAST year. Doh!

Where to find empty Glass (or plastic) fillable Ornaments
~This post contains affiliate links (including links to Amazon) which may reward me in the event of a sale.~
Shop Amazon with this Affiliate Link:
Plain fillable ornaments can be found at any craft store before Christmas. Online shopper can toss a few heavy duty glass balls in your Amazon cart .
I originally made this ornament ages ago before plastic globe ornaments were so easy to find. The glass globes are prettier and more sparkly, but if you’re working with little kids free free to sub plastic ornaments.
When you’re following my directions, you’ll want the SOLID ball type ornaments that only have access through the top. They also make ornaments that split in half, but then you’ll have a seam.
You’ll also need THIN plastic sheets or a piece of vellum if you can’t find the plastic. If you’re local to St. Louis you can find Grafix brand clear sheets at Schaefer’s Hobby or any of the big box craft stores.
Need more ornament ideas? I’ve got a bunch of easy ones for the kids right here!
How to Make a Floating Photo Ornament
Let me tell you a story first. I spotted the photo ornaments on email blast from a scrapbook store. It’s looked easy, so I grabbed my supplies and got to work. The first attempt…was not so good.

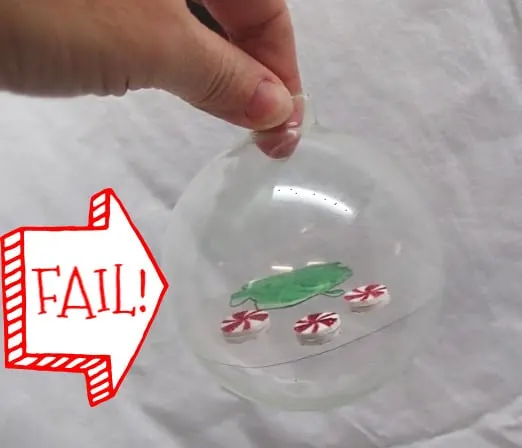
Here’s the basic idea: You cut a circle of plastic just smaller than the inside of the ornament, mount a photo or sticker on it, roll it up tight and jam it in the globe. Easy peasy, right?
The Trick to Floating Clear Ornaments
Riiiiight. Obviously I was missing something, so I went back to the ‘net and found the trick. If you just cut a circle of plastic and put it in an ornament, it rolls and floats all over place. Want to know the trick?
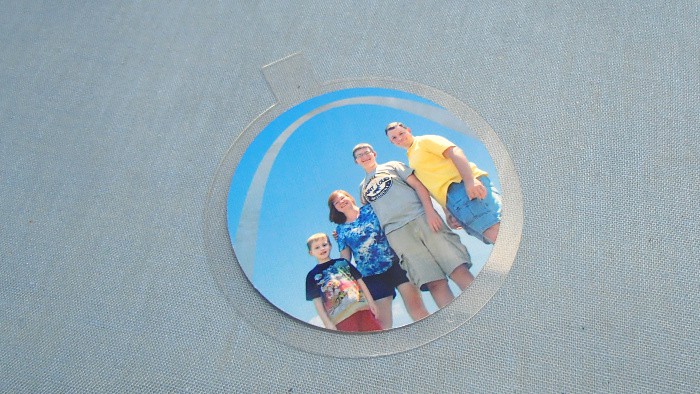
Ta da! You have to put a tab on the top of the plastic to keep the photo upright!
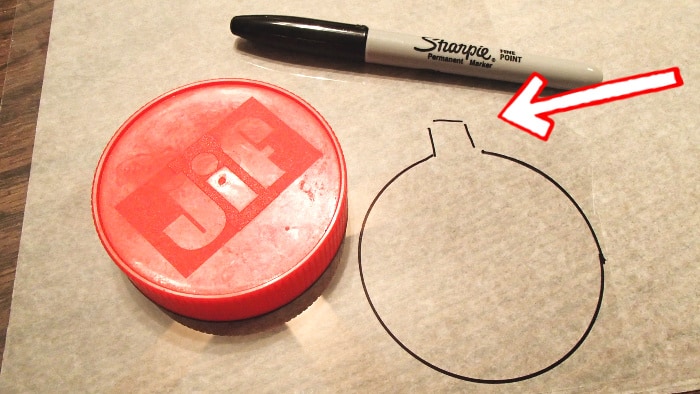

I also figured out that a peanut butter lid is about the right size for a 3 inch globe, so there’s really no need for fancy equipment–just find a lid the right size and a pair of good scissors. Keep the plastic clean and it totally disappears in the ornament–so do worry if your circle isn’t exactly perfect.
Make a Snowy Floating Photo Ornament
For the first style, you’ll need a winter photo that can be cut into a 3 inch circle (assuming you’re using the 3 inch globes). Use the peanut butter lid I mentioned above (or something fancier) to mark your circle. Cut a circle from the plastic sheet and stick it to the back with double stick tape.
Now add snow!
I sprinkled a little salt into the bottom of our snow photo (above) for a 3D effect. Salt is better than sugar because it won’t attract bugs in storage!
How to Make your Ornament Image Float
If your family photo isn’t snowy, then make this style–follow the same instructions as above, but make the photo a little smaller than the ornament.

Here’s a few more tips:
Roll the photo around a pencil to get it small enough. You’ll see what I mean when you try it!
Use double stick tape to mount the photo. You don’t need to cover the whole picture, just enough to get it to stick to the center of the plastic. Glue doesn’t work well for this project.
You can make the ornament two sided by using two photos, but it’s harder to roll up and quite frankly, how often do you look at the back of an ornament?
Feel the need to practice first? Cut a trial circle from plain paper and try it out. The thinner the paper, the easier it is to fish out with tweezers or a bamboo skewer. The only way to remove a photo from the glass ornament is to BREAK the ornament. (Yes, I did that too.)
Do you really need the plastic? YES! Without a plastic layer the photo won’t uncurl and you’ll be stuck with a curved photo in the ball. Maybe that’s ok, but it certainly lacks a little magic.
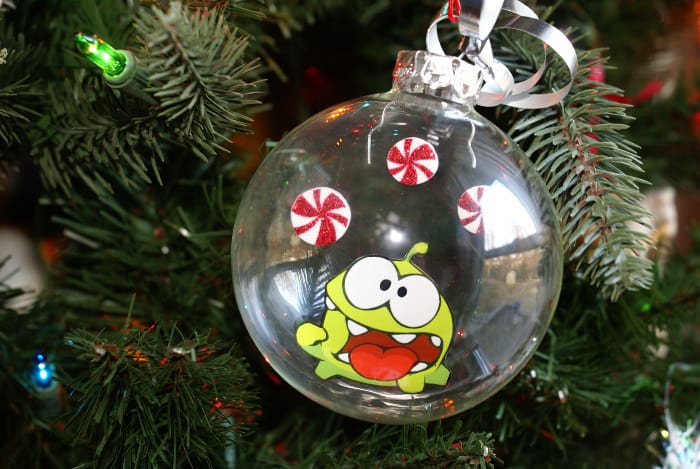

You can Float an Illustration or Drawing too!
You also don’t need to limit your decorations to photos. You can use something your kid drew or a favorite game characters on a sticker. This one is using Om Nom from Cut the Rope. We used the printable from this paper craft and only cut out Om Nom. Since he likes candy, we put a few peppermint stickers on with him. The plastic really makes it look like his candy is floating, don’t you think?

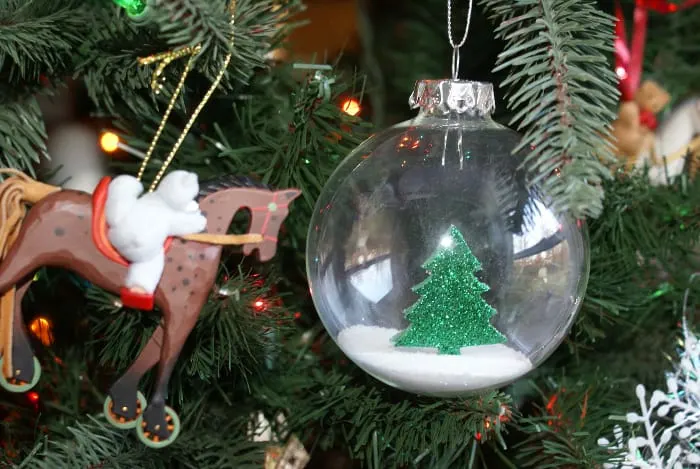
Use Foamy or Glitter Stickers in your Floating Ornament
We used a sparkly foamy Christmas tree sticker for this one. There’s two stickers in there, so it looks good on both sides. We poured salt into the bottom to look like snow. If you have sticker crazy kids in the house, you probably have a bunch of supplies for this one already!
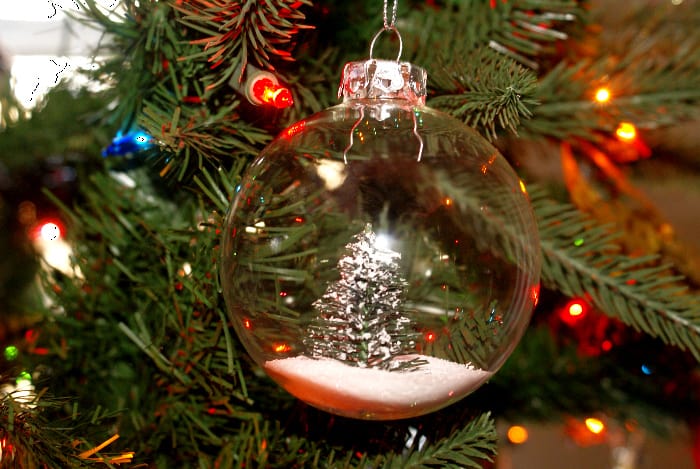
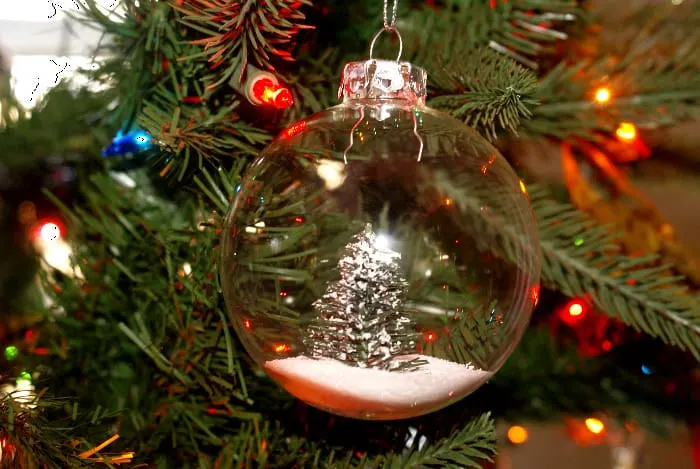
Put a Little Christmas Tree in There!
This one is using a fake tree from a Christmas village and salt for the snow. I got the directions from Pinterest…there’s a good video from The Crafty Blog Stalker to show you how to do it. You’ll want to cut off the bottom of a tiny fake tree and crush the bristles a bit to make sure it will fit. My dog helpfully suggested we get the tree wet first–he tried to chew up one of these trees. He was right–if you rinse the tree it softens the gluey paint they use for snow. I suggest using the sink, not your dog.
The tricky part is squirting hot glue into the bottom of the ornament and sticking the tree in using tweezers. Hold the tree with the tweezers long enough for the glue to harden. Salt provides the snowy ground and covers the glue.