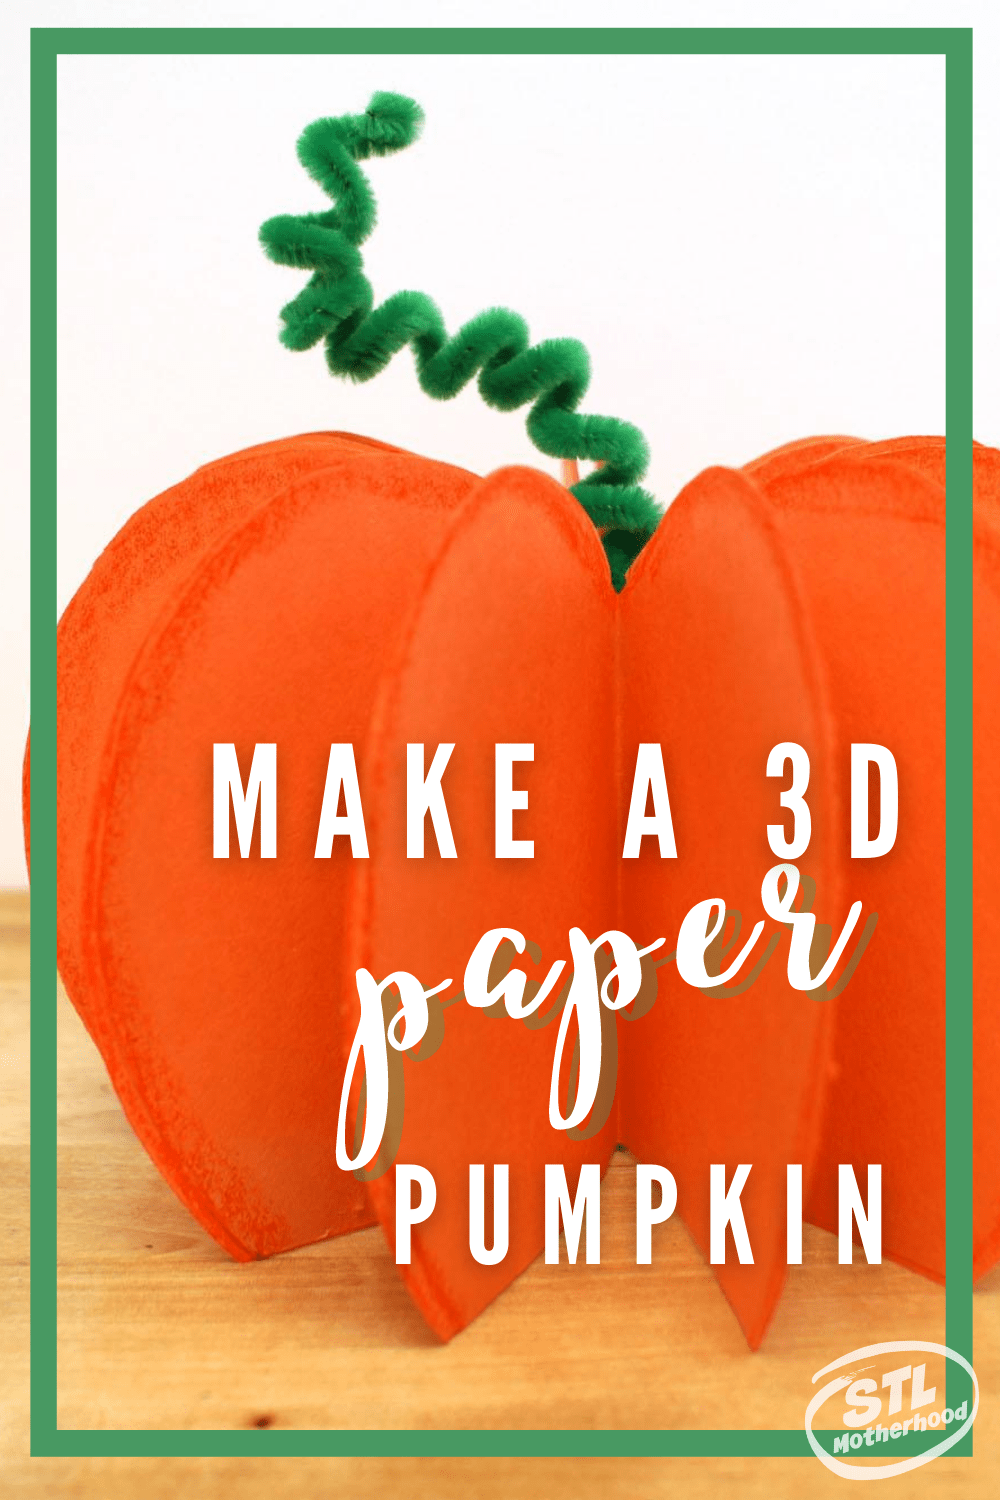
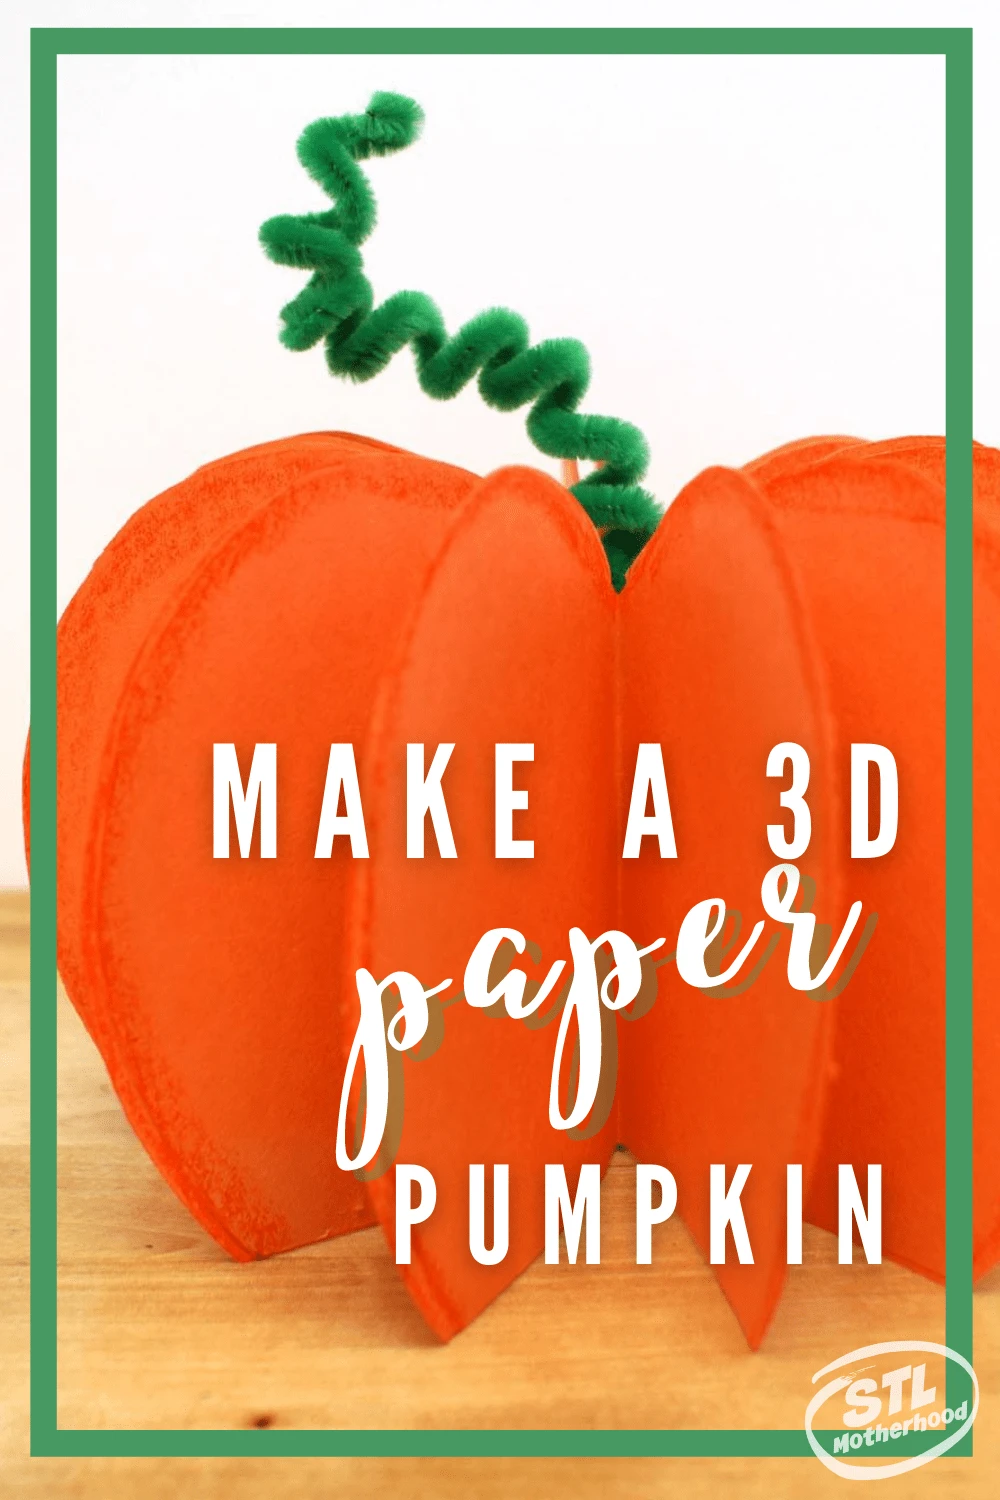
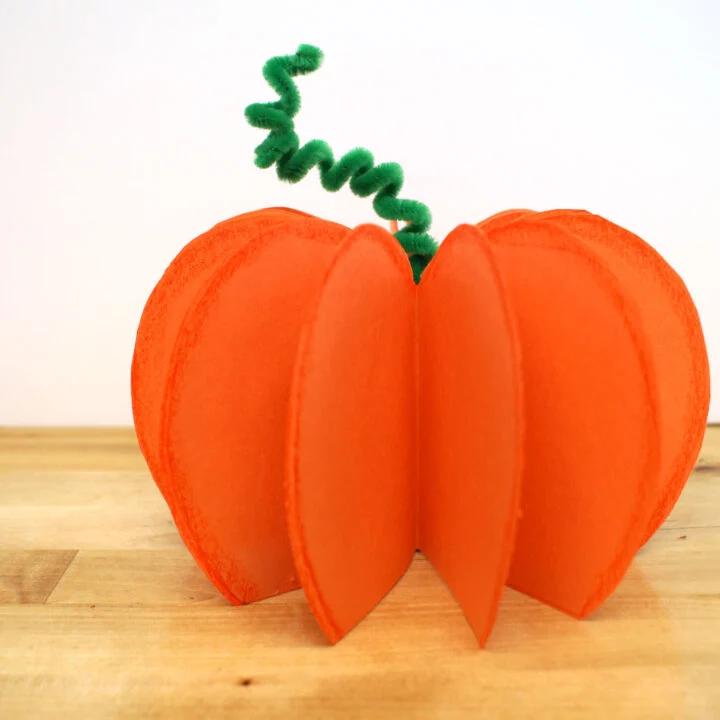
Here’s a great 3D paper pumpkin for fall that your kids can craft with just a tiny bit of help from mom. You can make it from a few sheets of orange construction paper and a green fuzzy stick.
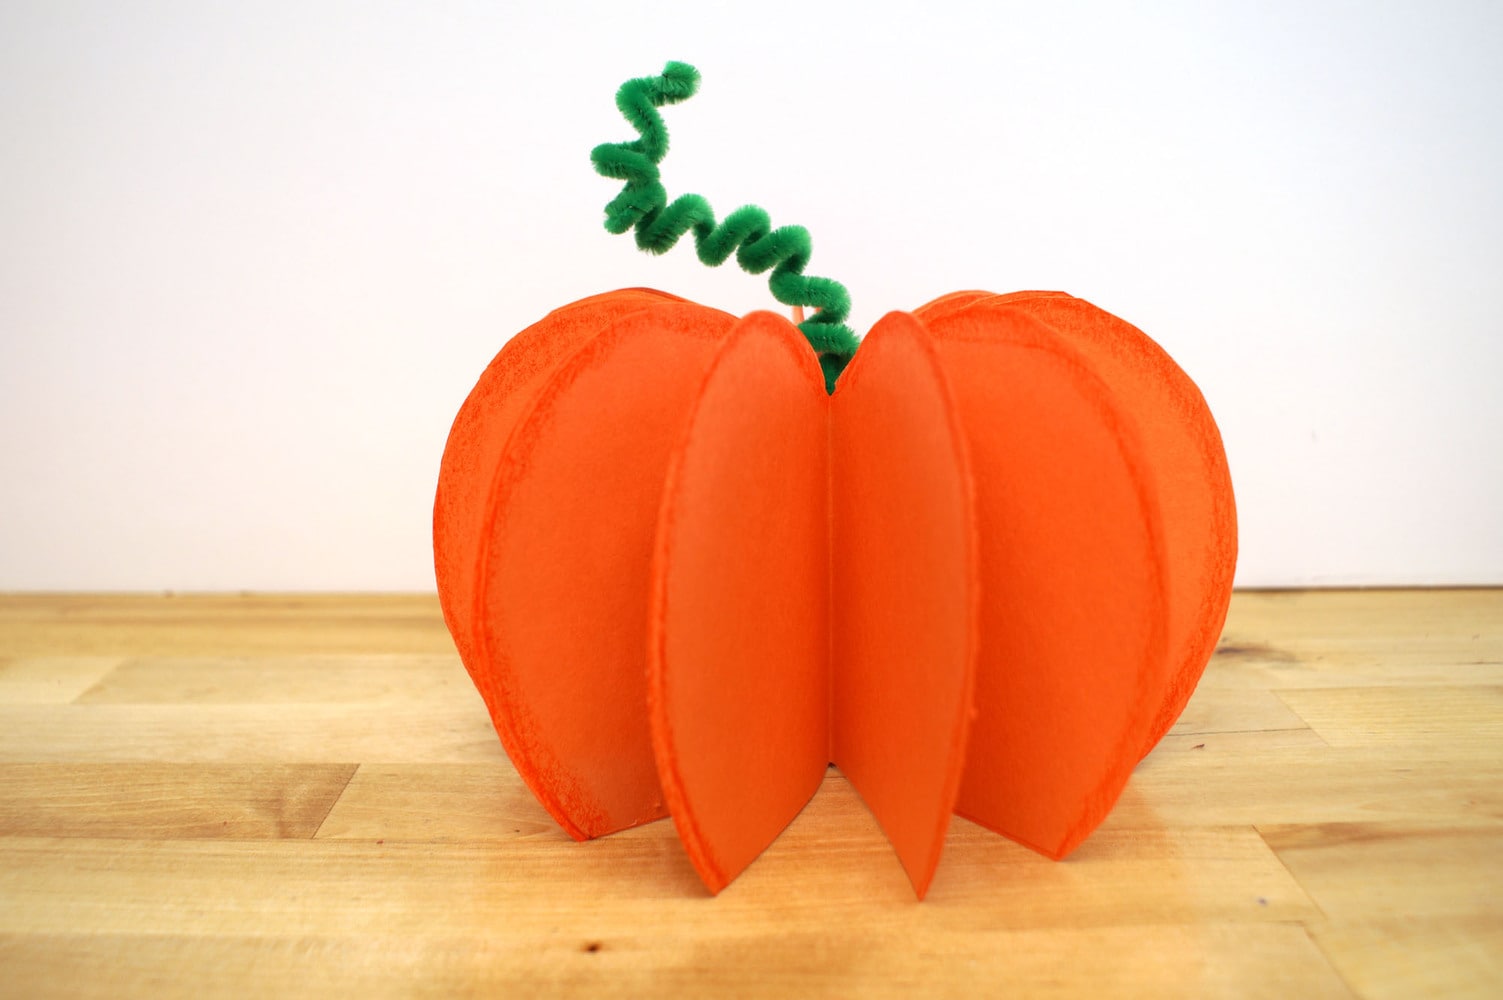
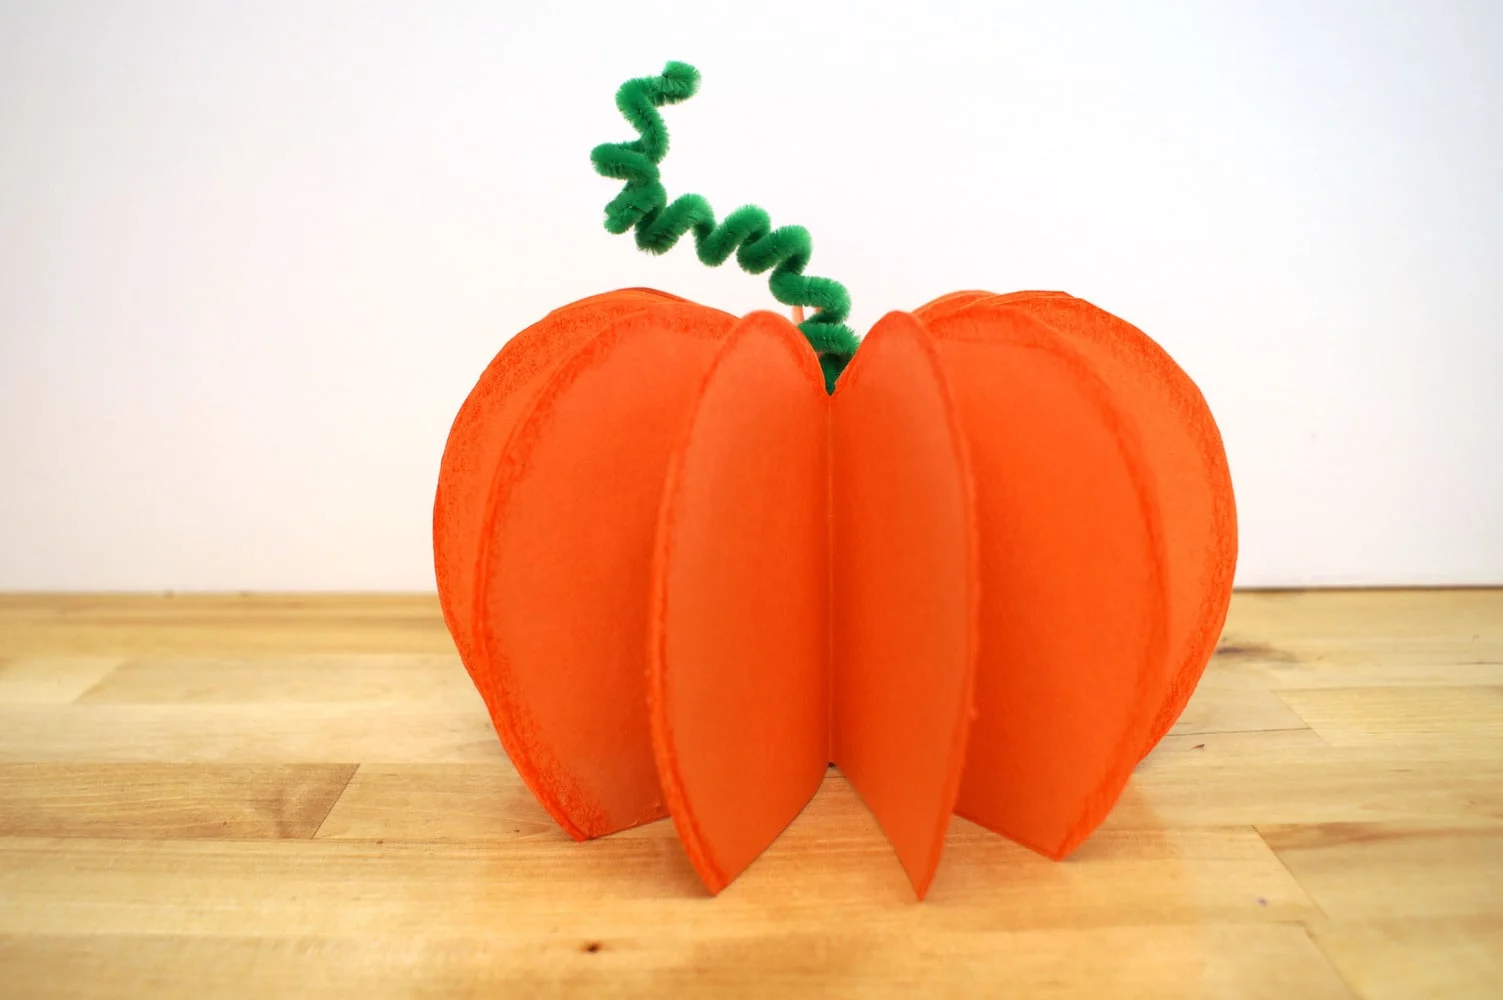
The free standing style of this 3D pumpkin makes a great center piece or a decoration for the shelf.

How to Cut a 3D Paper Pumpkin
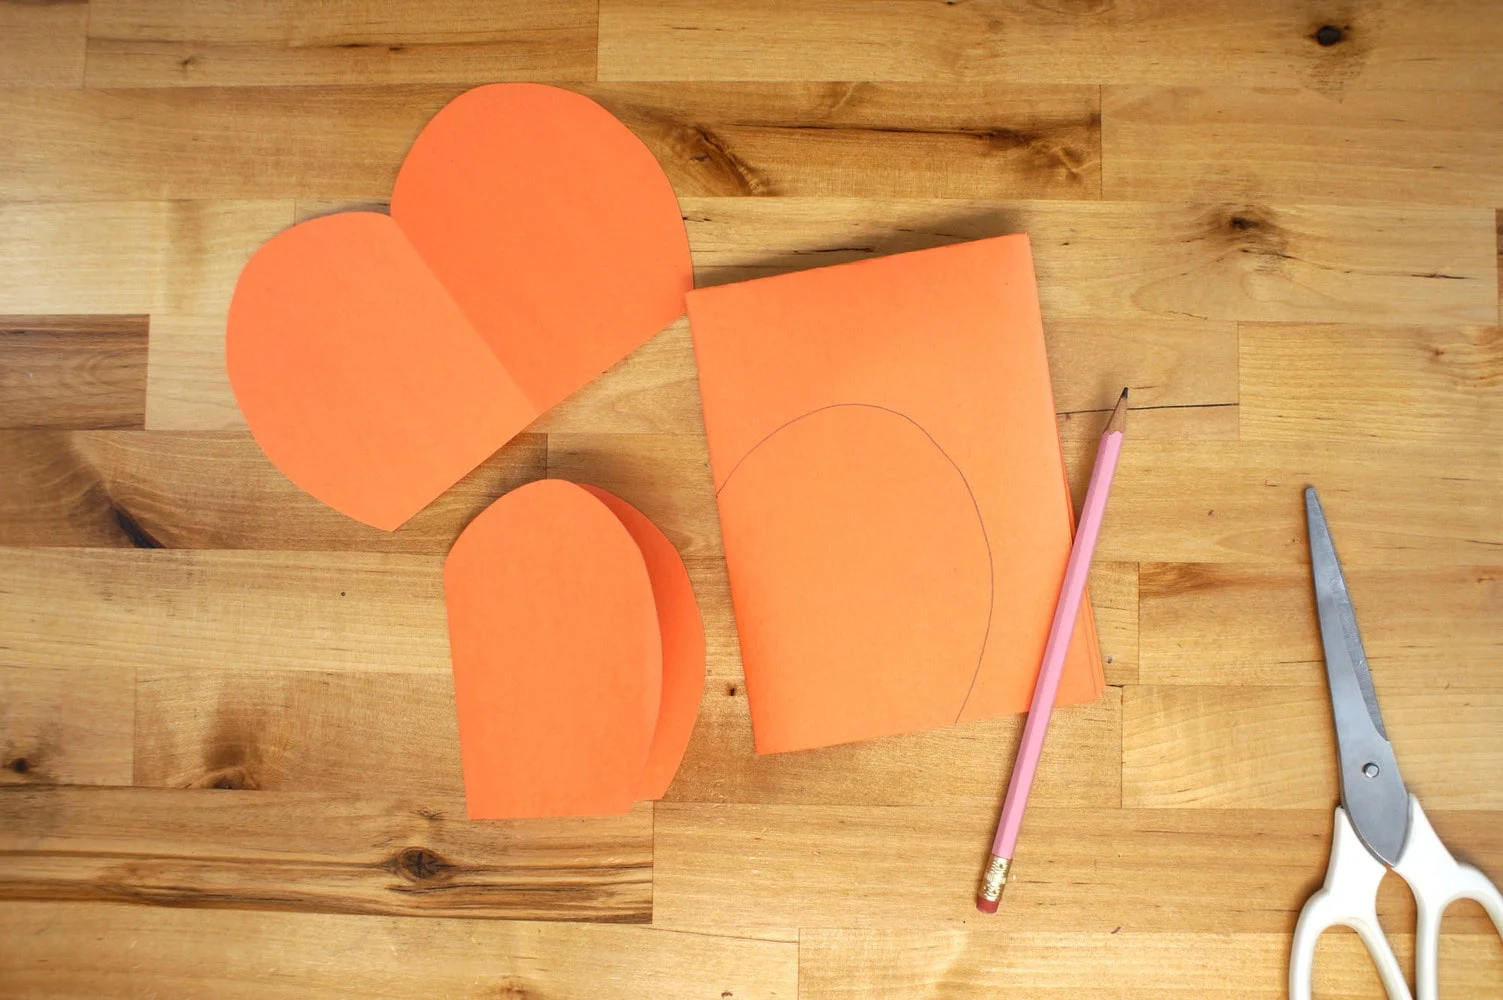
This is so easy, you don’t even need a template–well, not from me! Each pumpkin “slice” is made like a paper heart. See, it’s simple!
To make a slice, fold your paper in quarters. Draw the upper part of a heart (see photo above) lightly in pencil. For best results use the bottom edge of the paper as the bottom of your pumpkin slice — this will keep your whole pumpkin nice and flat.
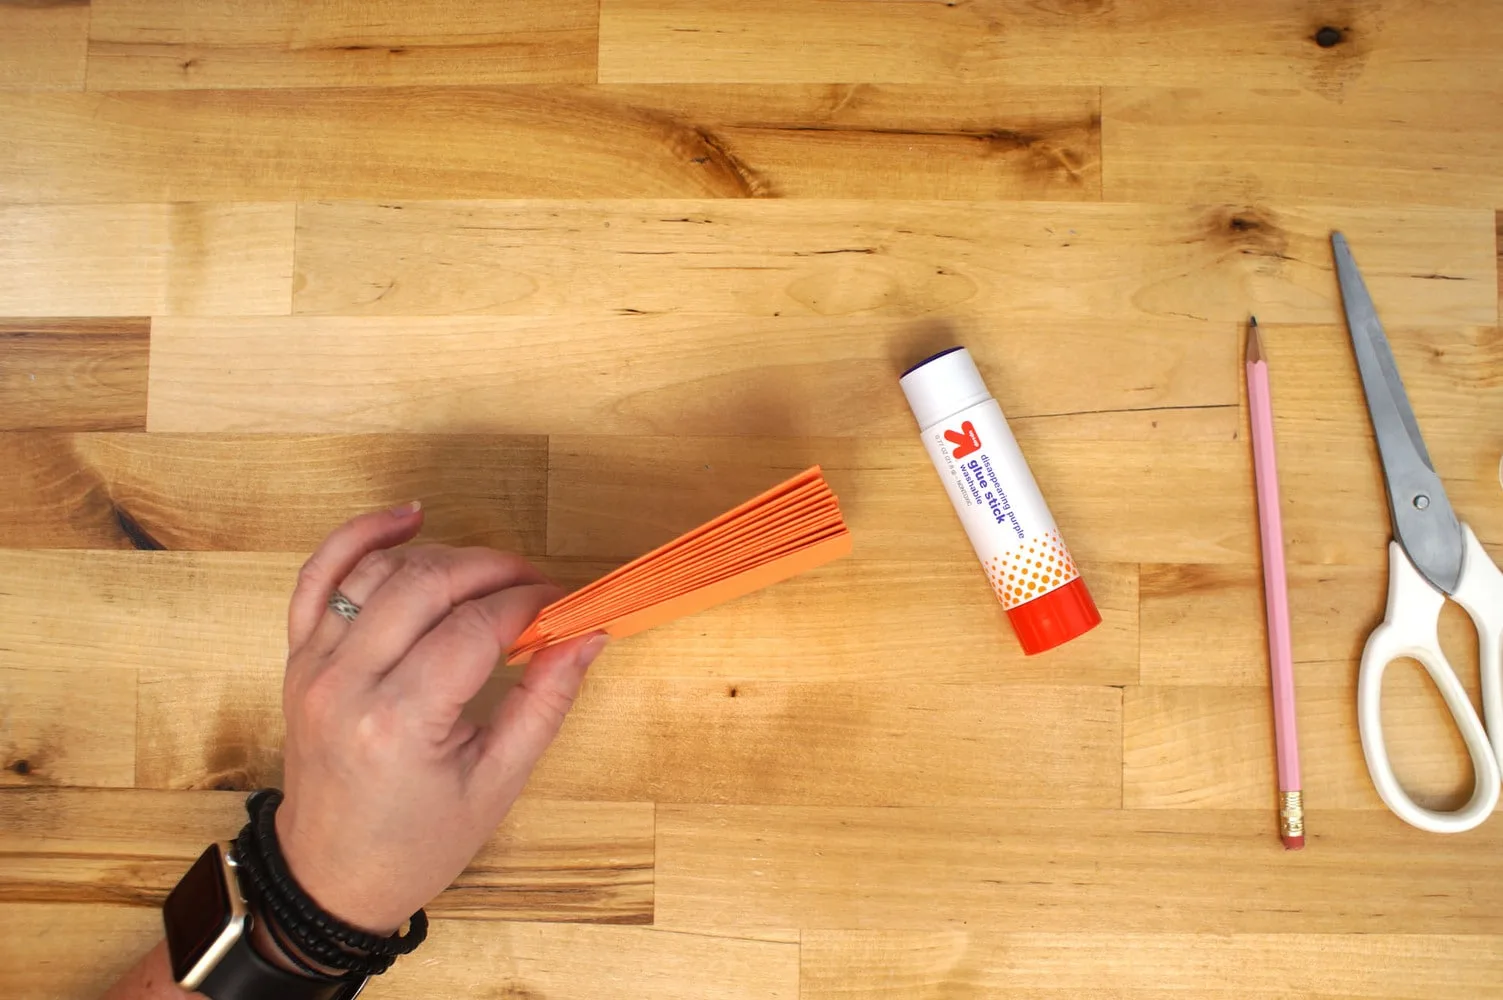
Cut ONE heart-pumpkin shape. Now use THAT shape as your template, and trace it on more pieces of paper.
We used six pieces of orange construction paper in our pumpkin, two slices per paper, so there were 12 slices all together. The more slices you use, the fuller your pumpkin will be.

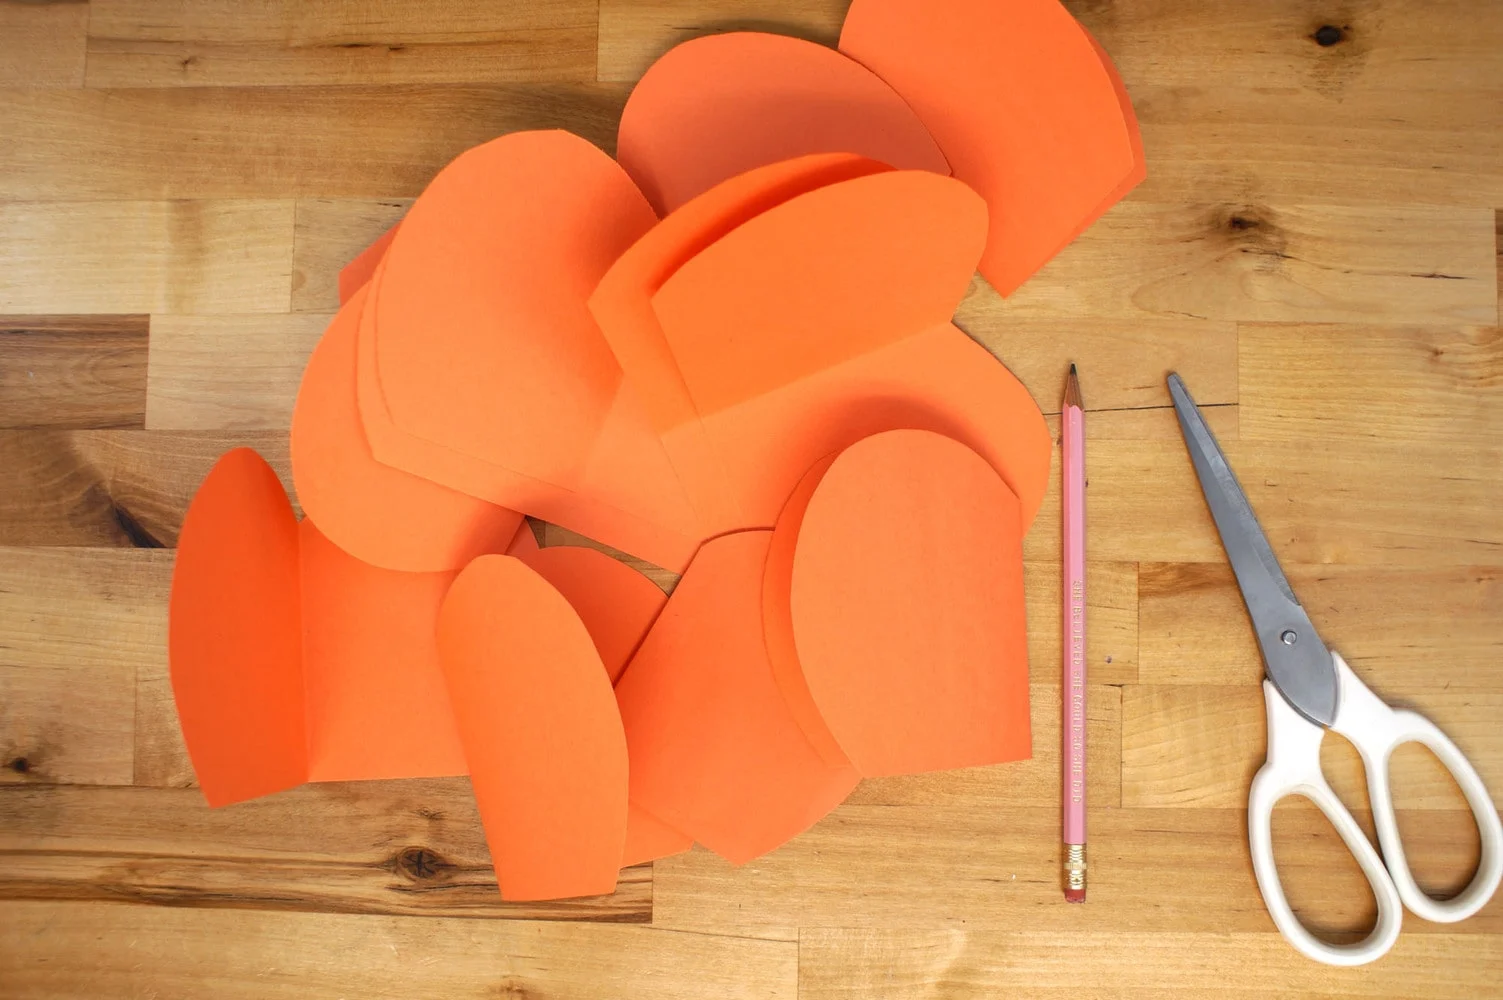
Once all your slices are cut, you’ll glue them into a stack. The bottom of each slice should line up — it’s ok if the rest of the edges are a little wobbly.
By the way — we used a glue stick (Target brand) for this job. It dries pretty fast and doesn’t warp your paper.

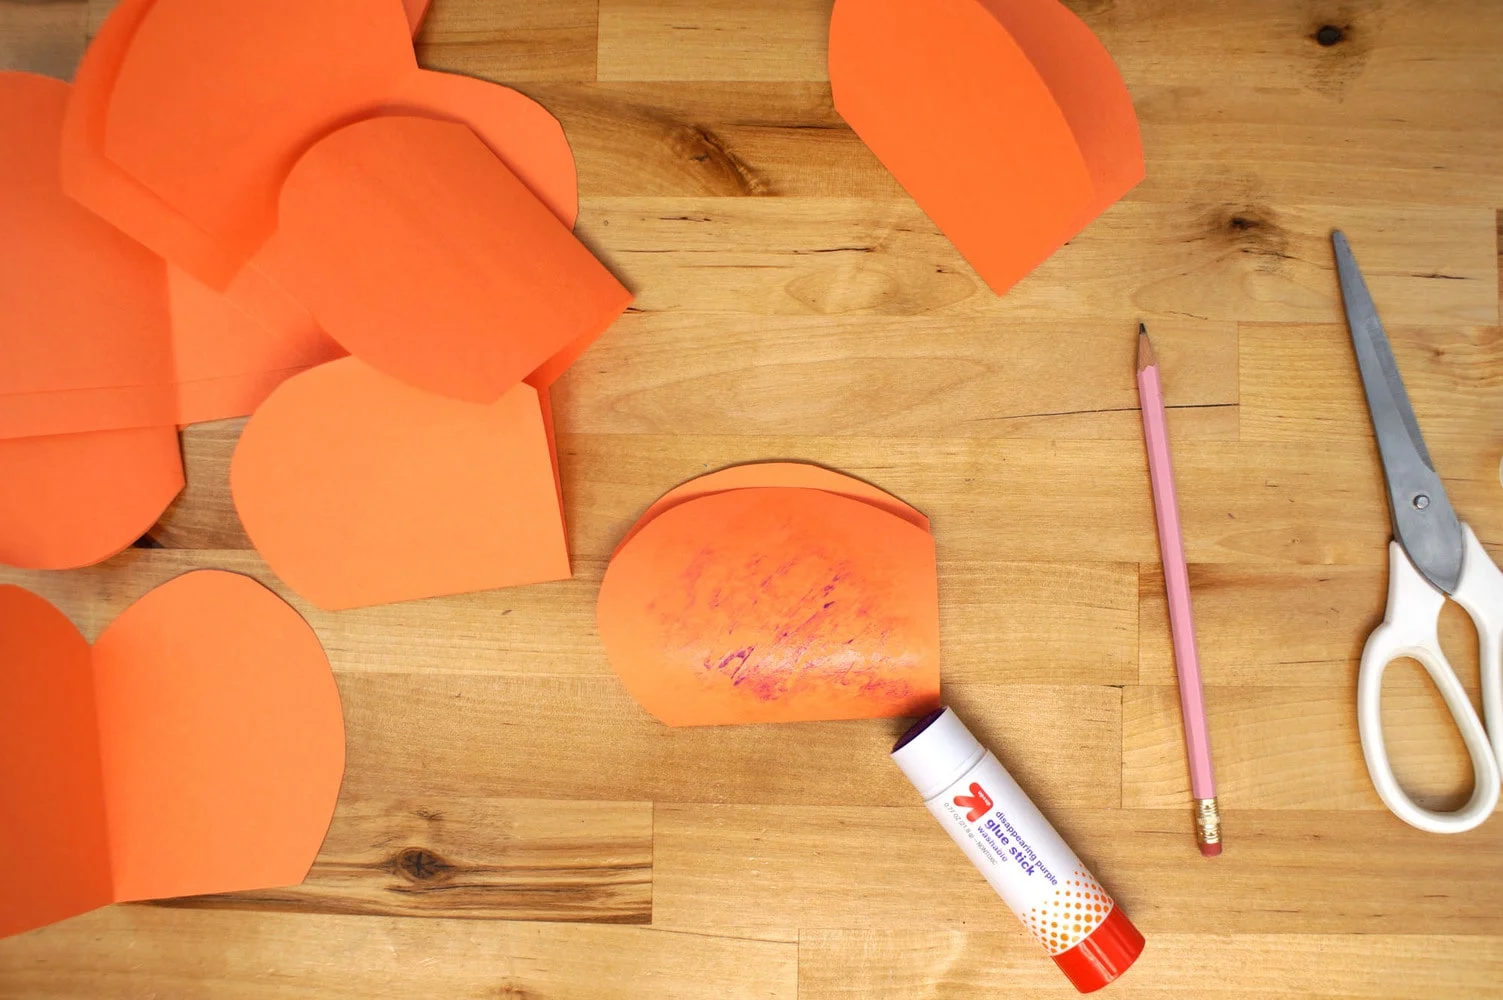
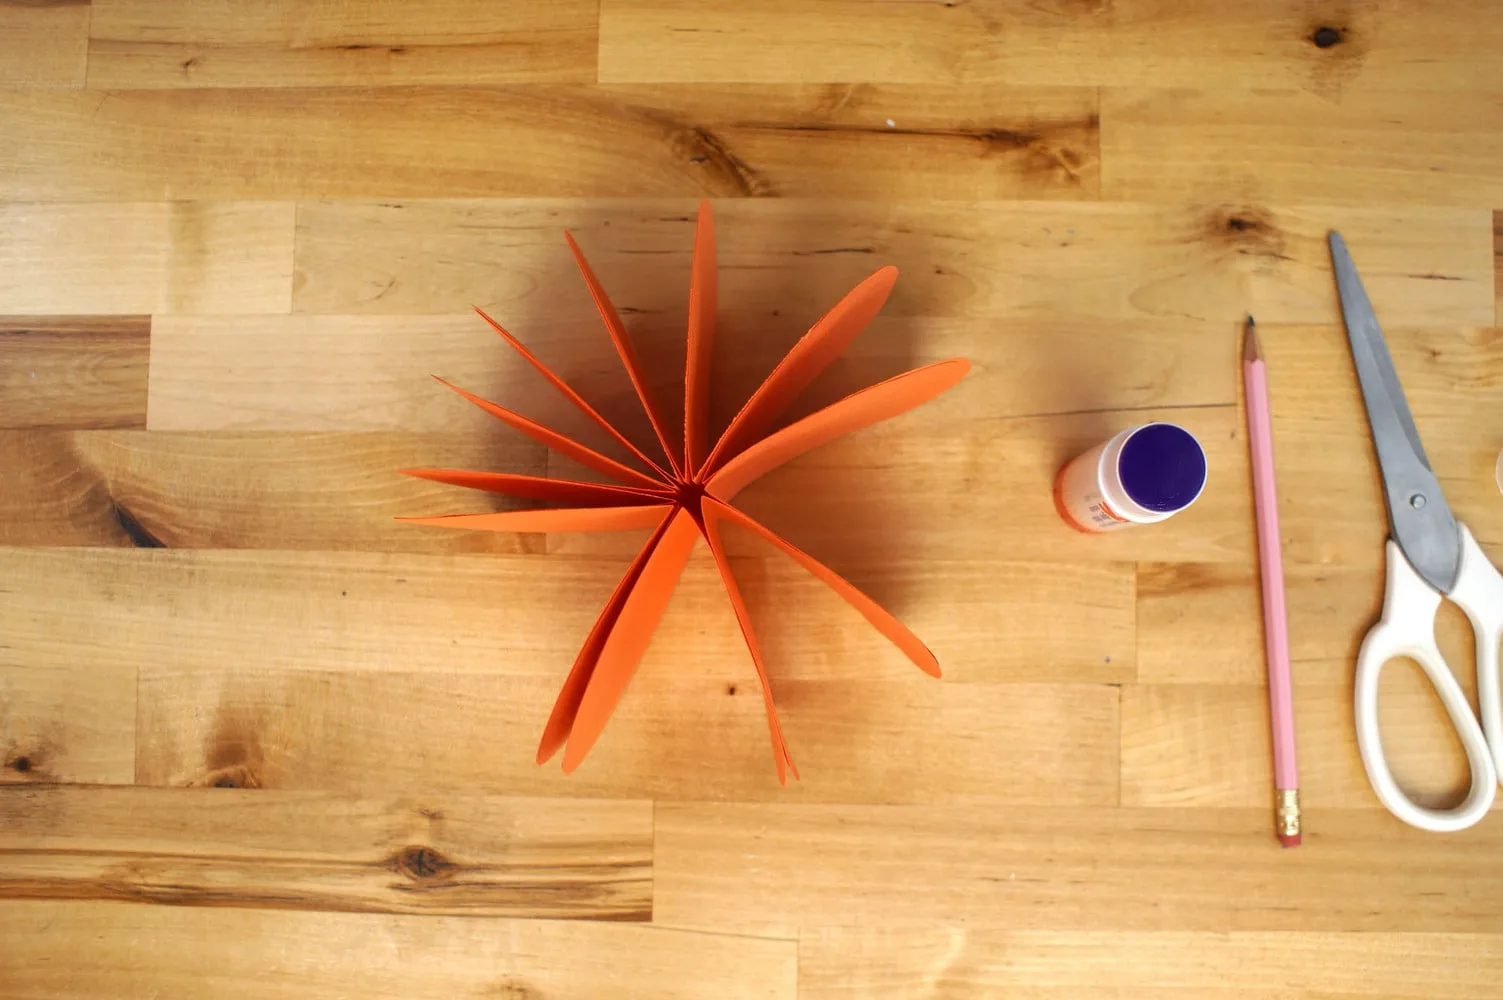
Once you’ve glued the stack, you’ll glue the top and bottom together so the stack now forms a circle.


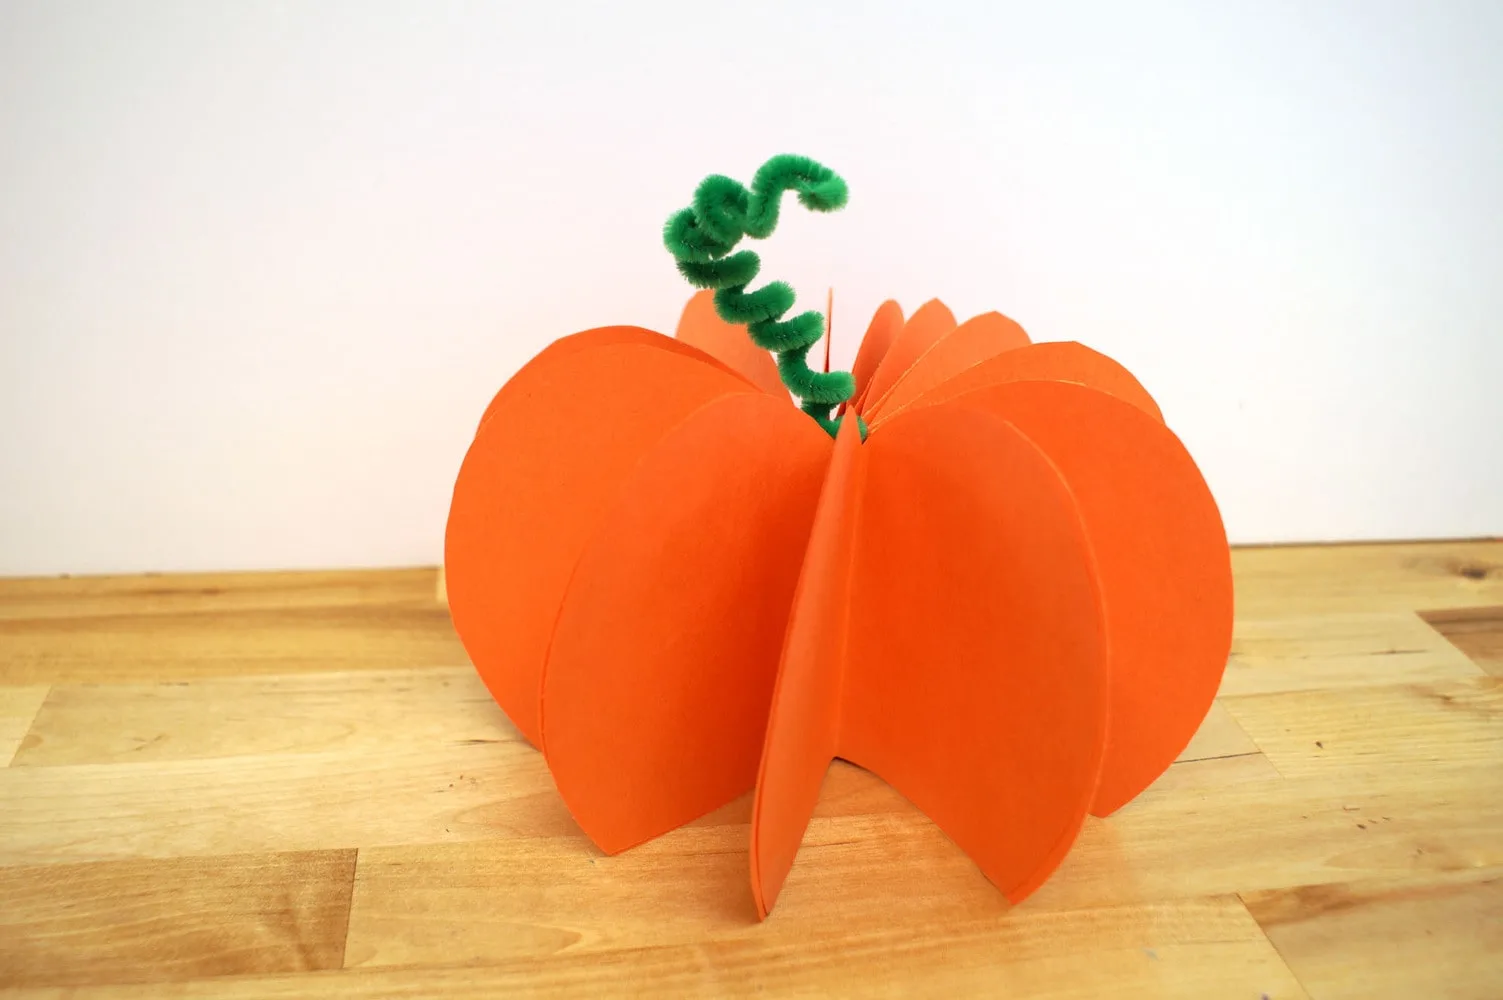
Now you could call it done at this point, but it could really use a little something to make it pop.
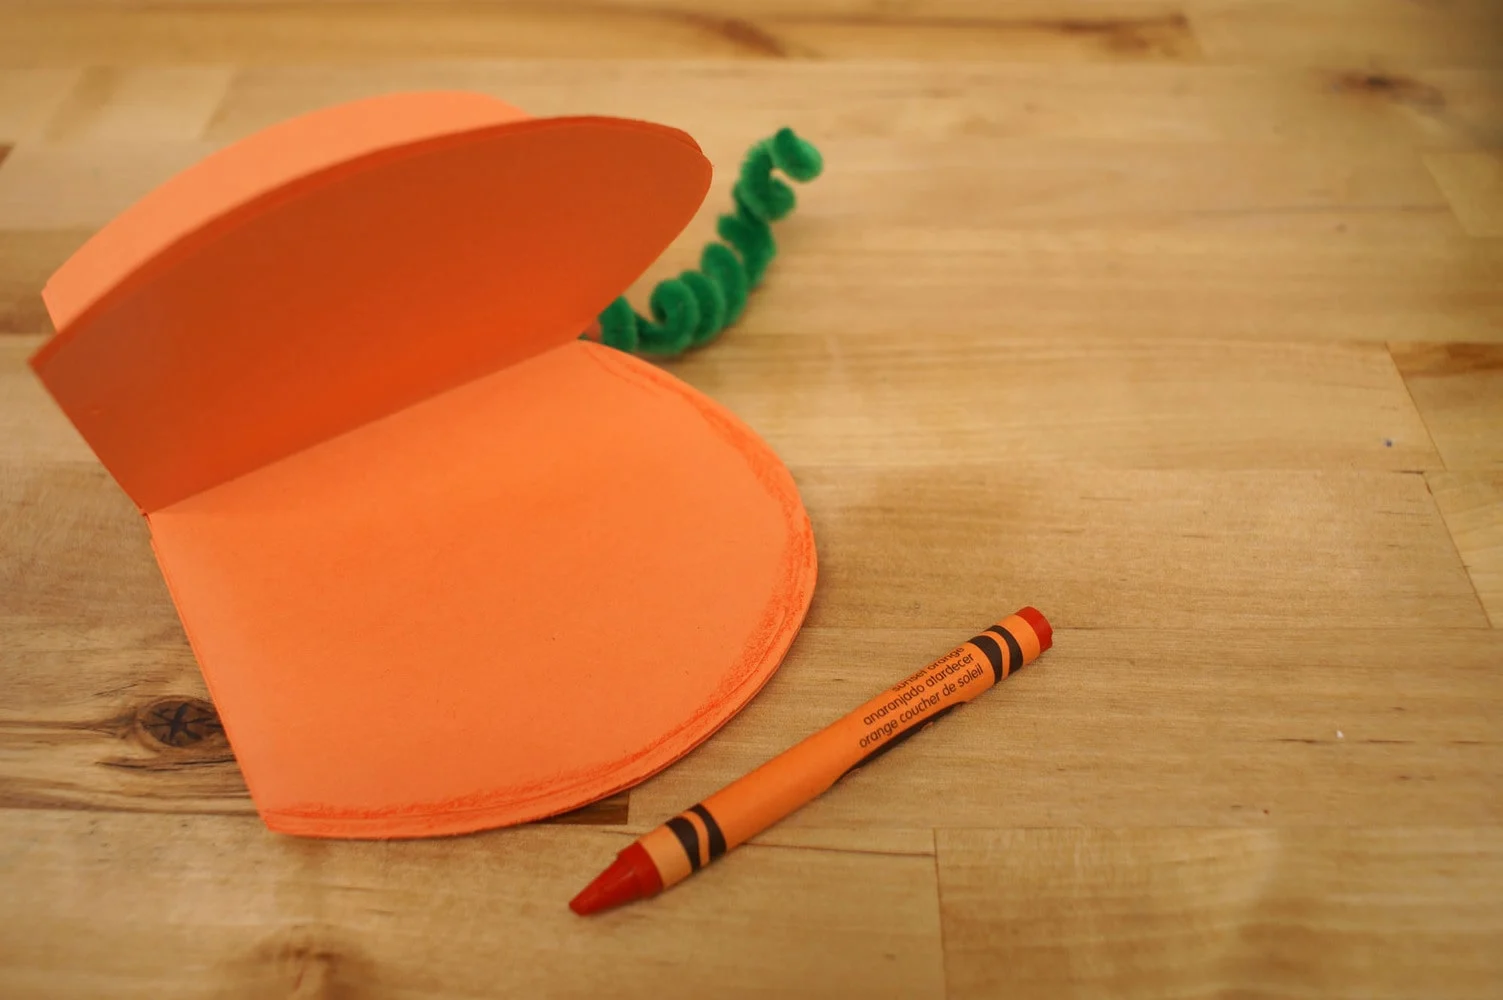
We’re going to add contrast with a dark orange crayon around the edges! Simply open the pumpkin up flat and color a border on each slice.
We got tired of coloring all those slices, and switched to using the bottom of the crayon to make a nice even smudge of color. You can do this how ever you like!

In fact, I bet some glitter would look pretty good on that edge too!
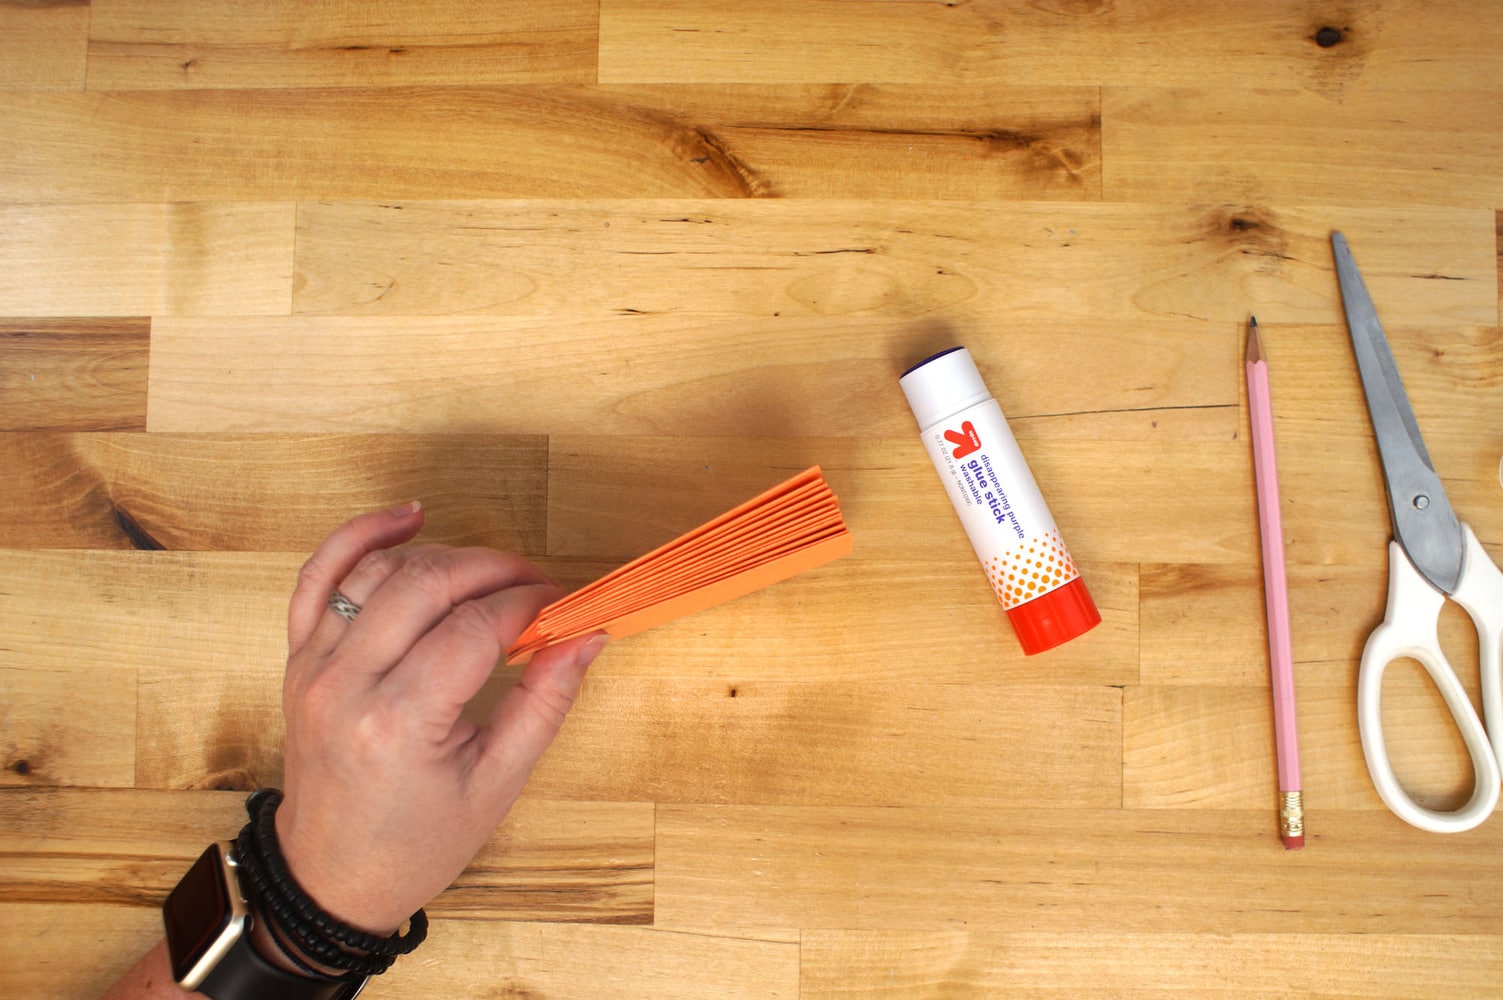
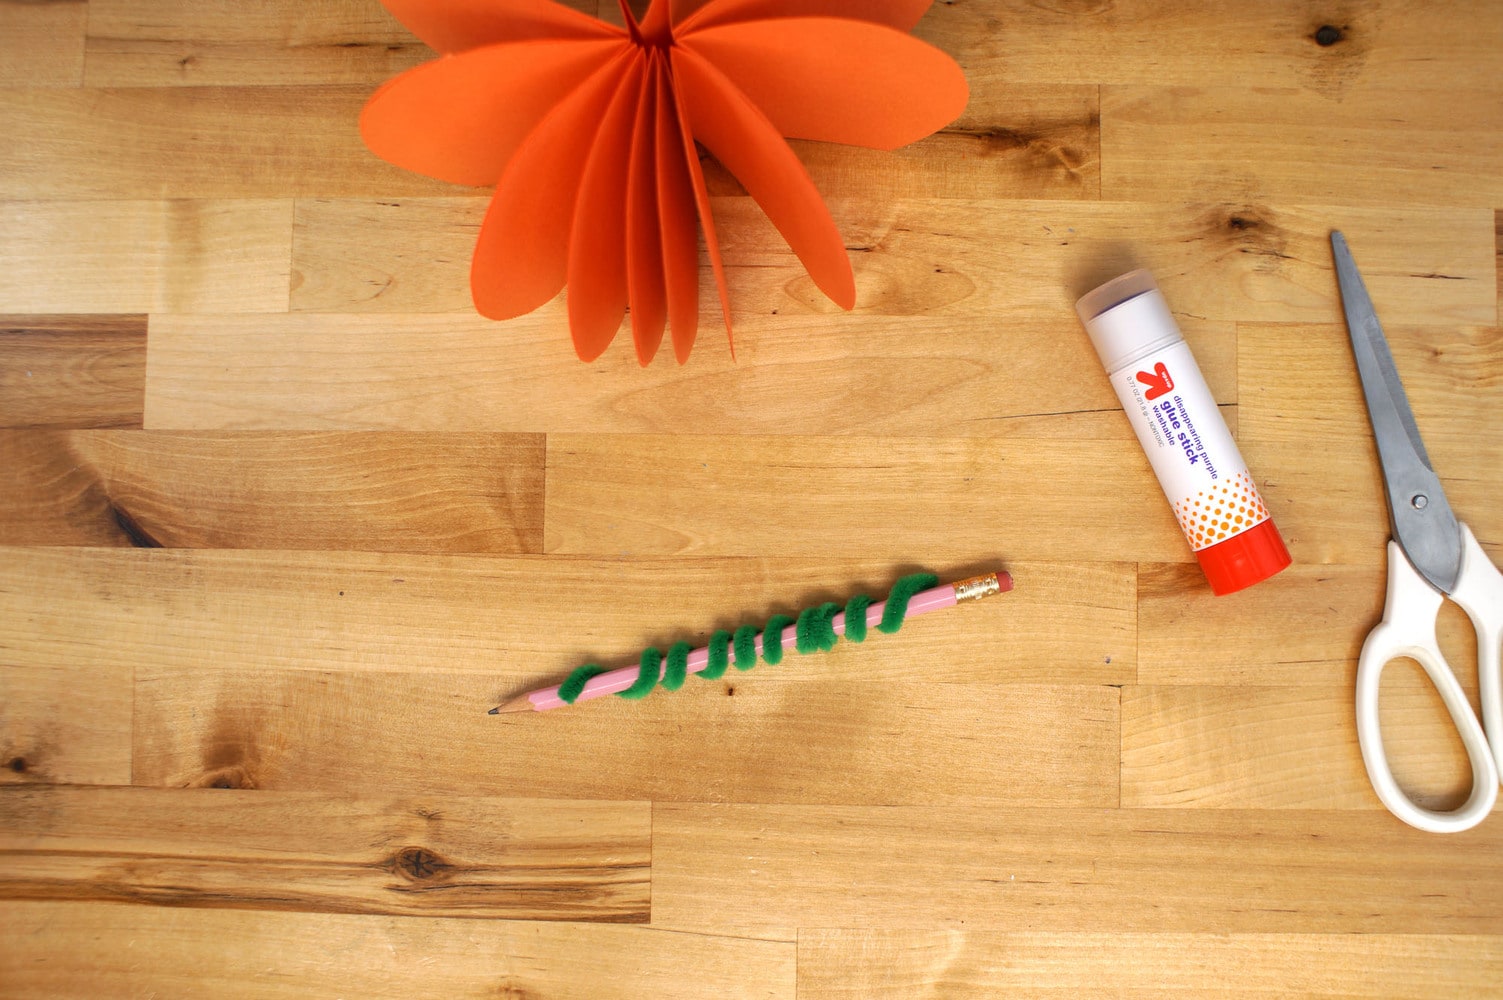
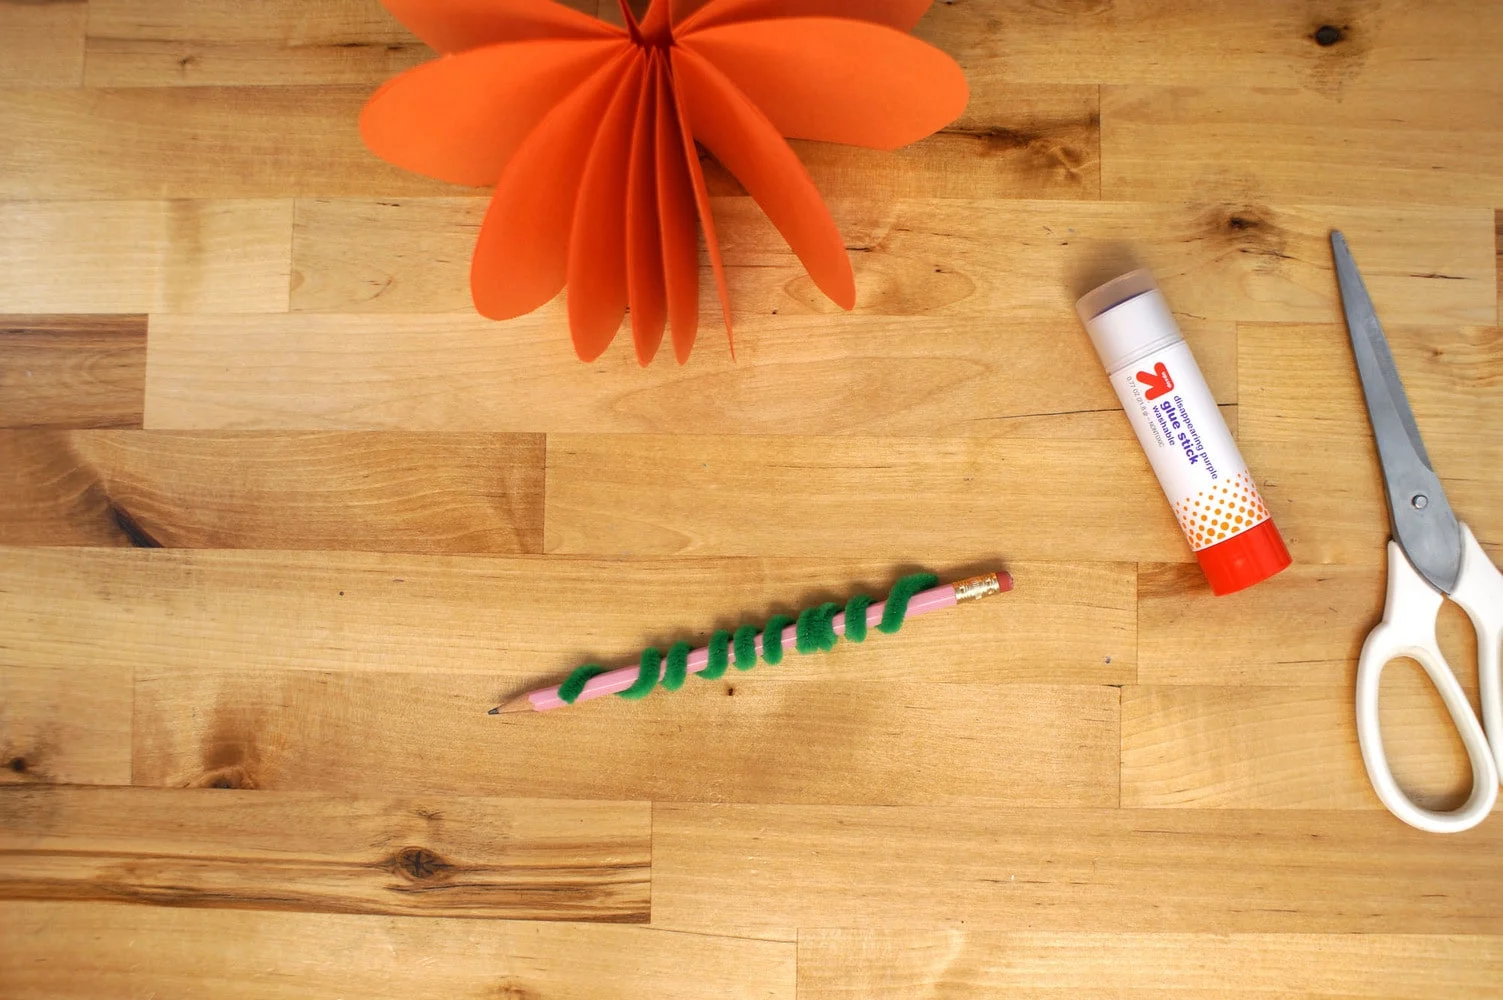
Finish your pumpkin with a curly cue of green fuzzy stick! Wrap the fuzzy stick around a pencil to get a nice curl. Pop it into the center hole of the paper pumpkin and shape!

3D Paper Pumpkins
Make a super easy three dimensional paper pumpkin for your fall table decoration.
Materials
- 6 Sheets Orange Construction Paper
- 1 Green Fuzzy Stick
- Glue Stick
Tools
- Scissors
- Pencil
Instructions
- Fold a sheet of paper into quarters.
- Draw the upper half of a heart on the paper, using the edge of the paper as the bottom.
- Cut out the heart shape. (You'll get TWO pumpkin slices)
- Use one "pumpkin slice" as a template to cut the the remaining slices.
- Glue together with the fold in the center and the bottom edges lined up.
- Glue top and bottom slice together forming a circle.
- Twist a fuzzy stick into a spiral around a pencil.
- Place the twirl in the center of the pumpkin as the stem.