Let’s talk old timey STEAM. Did you know that Victorian kids loved to make their own toys?
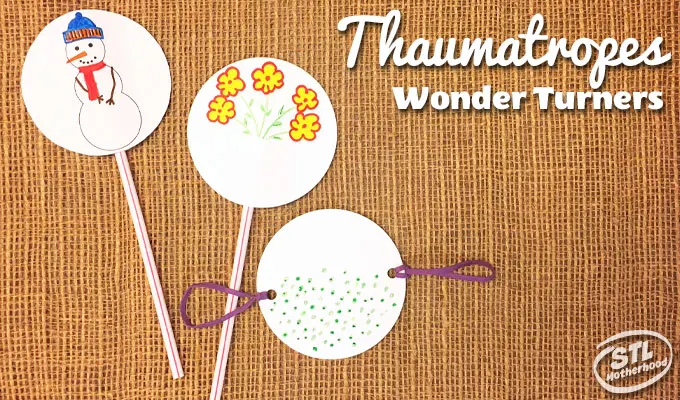
We decided to make a really cool Victorian toy called a “Thaumatrope”. Oh, and if your kid has a hard time pronouncing Thaumatrope, just call it a wonder turner, from the Greek words wonder + turn. It’s an optical illusion toy!
STEM = Science, Technology, Engineering & Math

This craft is great when you need a break from the screen and want to do something creative.
Mitch and I love playing with paper crafts and optical illusions are our latest
fascination. The kids have made these wonder turners at school and they’re a pretty cool example of how animation works.
The Thaumatrope is a disk with an image on either side. When you spin the disk (with either a string or a stick) the two images blend due to “persistence of vision.” You can watch this old Mr. Wizard video to get a full explanation.
Make Your Own Thaumatrope
There’s several ways to make your own Wonder Turner, but for any method you’ll need the same supplies: cardstock, markers and double sided tape. You’ll also need scissors and either a straw or two rubber bands and a hole punch, depending on which way you want to spin it.
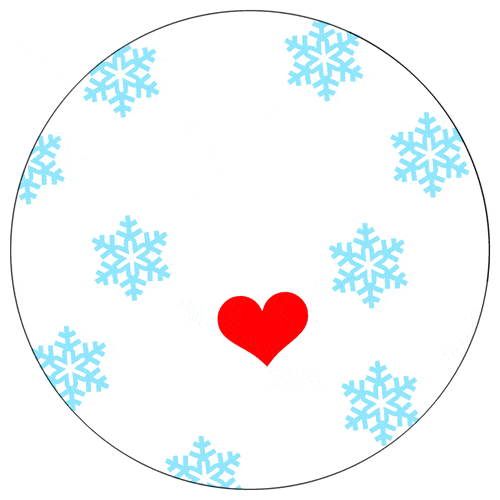
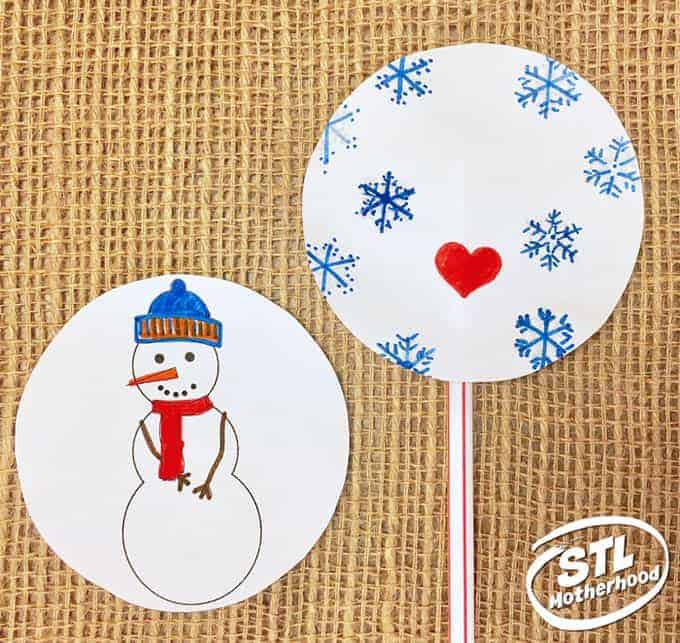
I made a template if you need a little help with planning: a cute snowman with a heart. Just grab this snowman image to get your started.
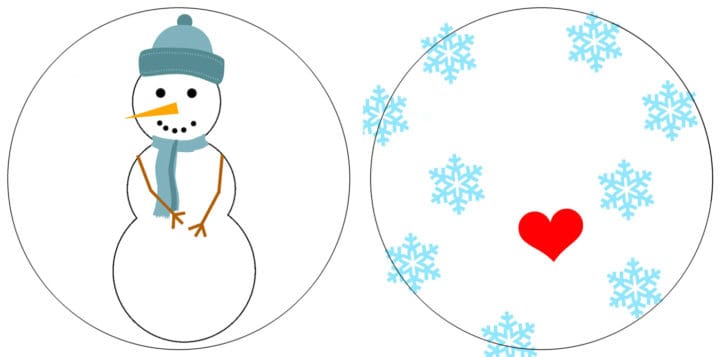
To make the Thaumatrope, print out the snowmen. You can print it on regular paper, but you’ll get better results with cardstock–or even photo paper! As you can see from my first experiment, there’s a little wrinkle in my Wonder Turner.
For Straw Mounted Wonder Turner
Tape a straw to the back of one image. Use double stick tape and place the second image so that both pictures are right side up. You can use a tracing table or a sunny window to help you place the images on straight.

Roll the stick back and forth with your hands to create the optical illusion!
For String Pull Wonder Turner
This method REQUIRES cardstock!
Cut out your snowman images. Use a sunny window to line up the pictures, but this time, put one UPSIDE DOWN. Use double stick tape to stick them together.
Punch a hole on either side of the disk–try to get them lined up as best you can!
Thread a rubber band through each hole & make a half hitch knot. (Pull one end of the rubber band through the loop.)
Create the illusion by spinning the disk.
Watch the video below to get a better idea how it works!
Draw Your Own
After you make the snowman, your kids will want to make their own design! It’s super simple! Just remember to use BOLD colors with lots of contrast for the best results, and a tracing table or sunny window to get your images to line up exactly.
More Thaumatropes around the web:
Valentine Thaumatrope from Babble Dabble Do.