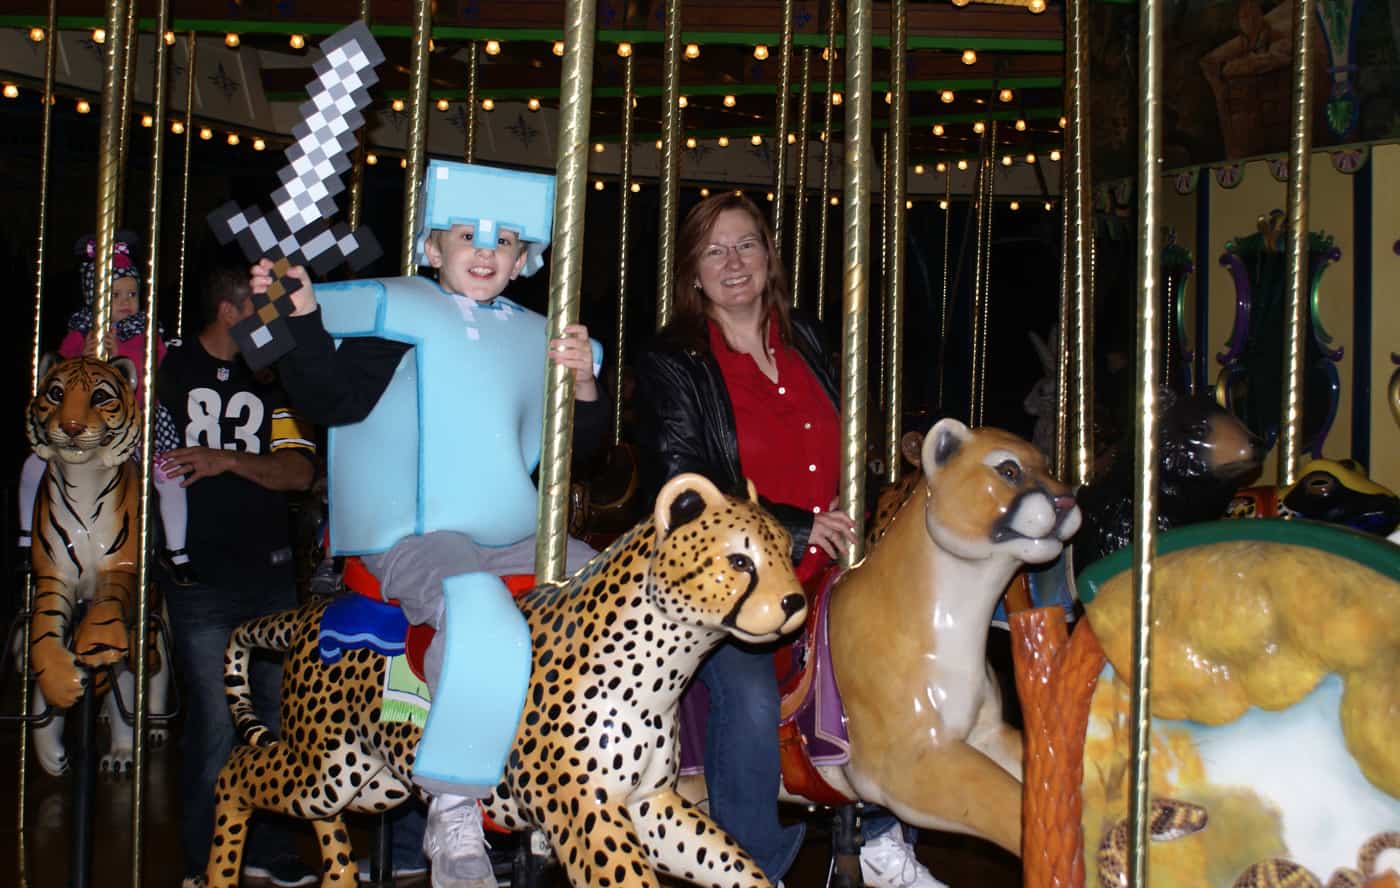
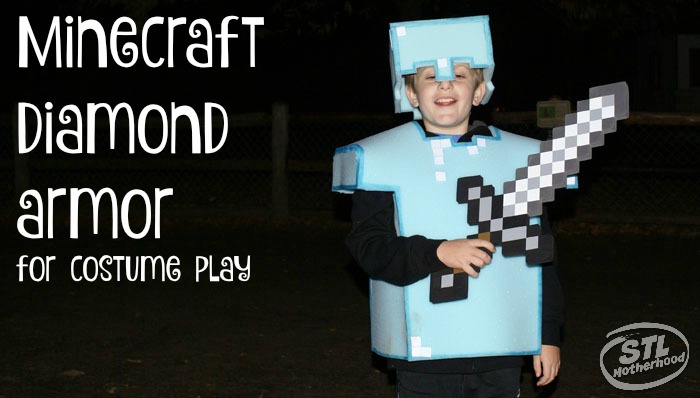
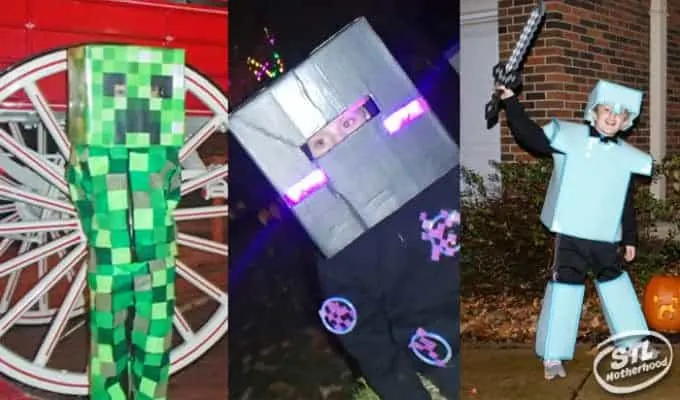
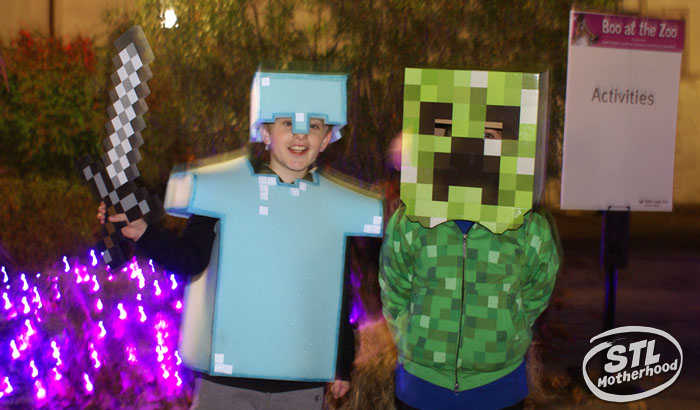
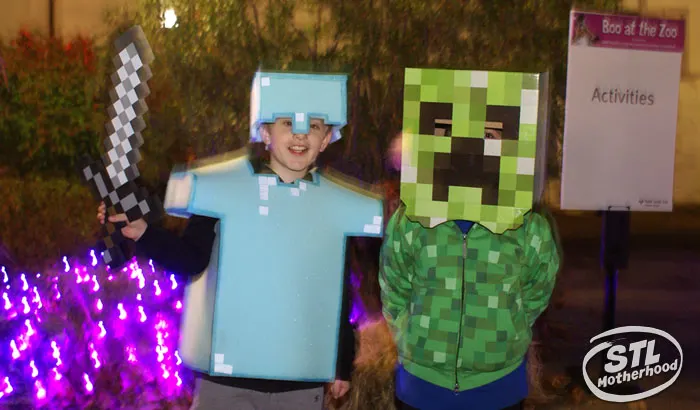
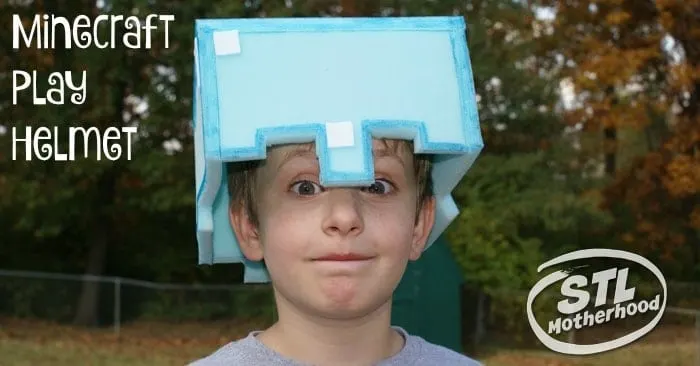
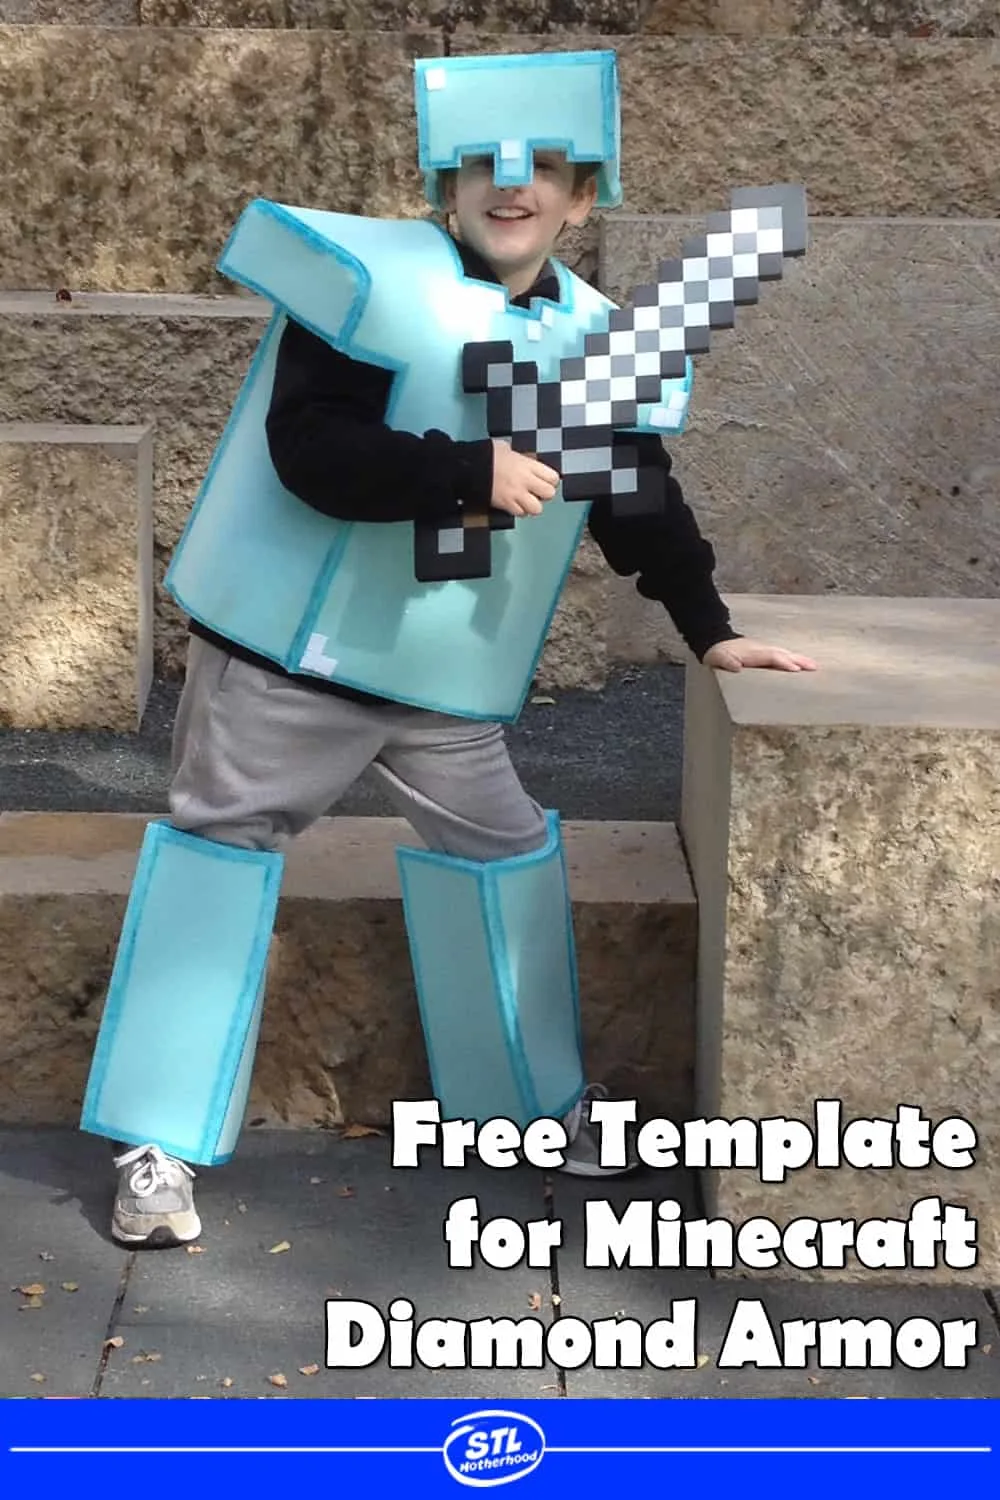
Here’s Mitch’s third Minecraft costume: himself!
I wanted to make him a cool “Steve” costume with full armor, but we decided to ditch the square-head-hat* in favor of a more comfortable set of Minecraft style diamond armor.

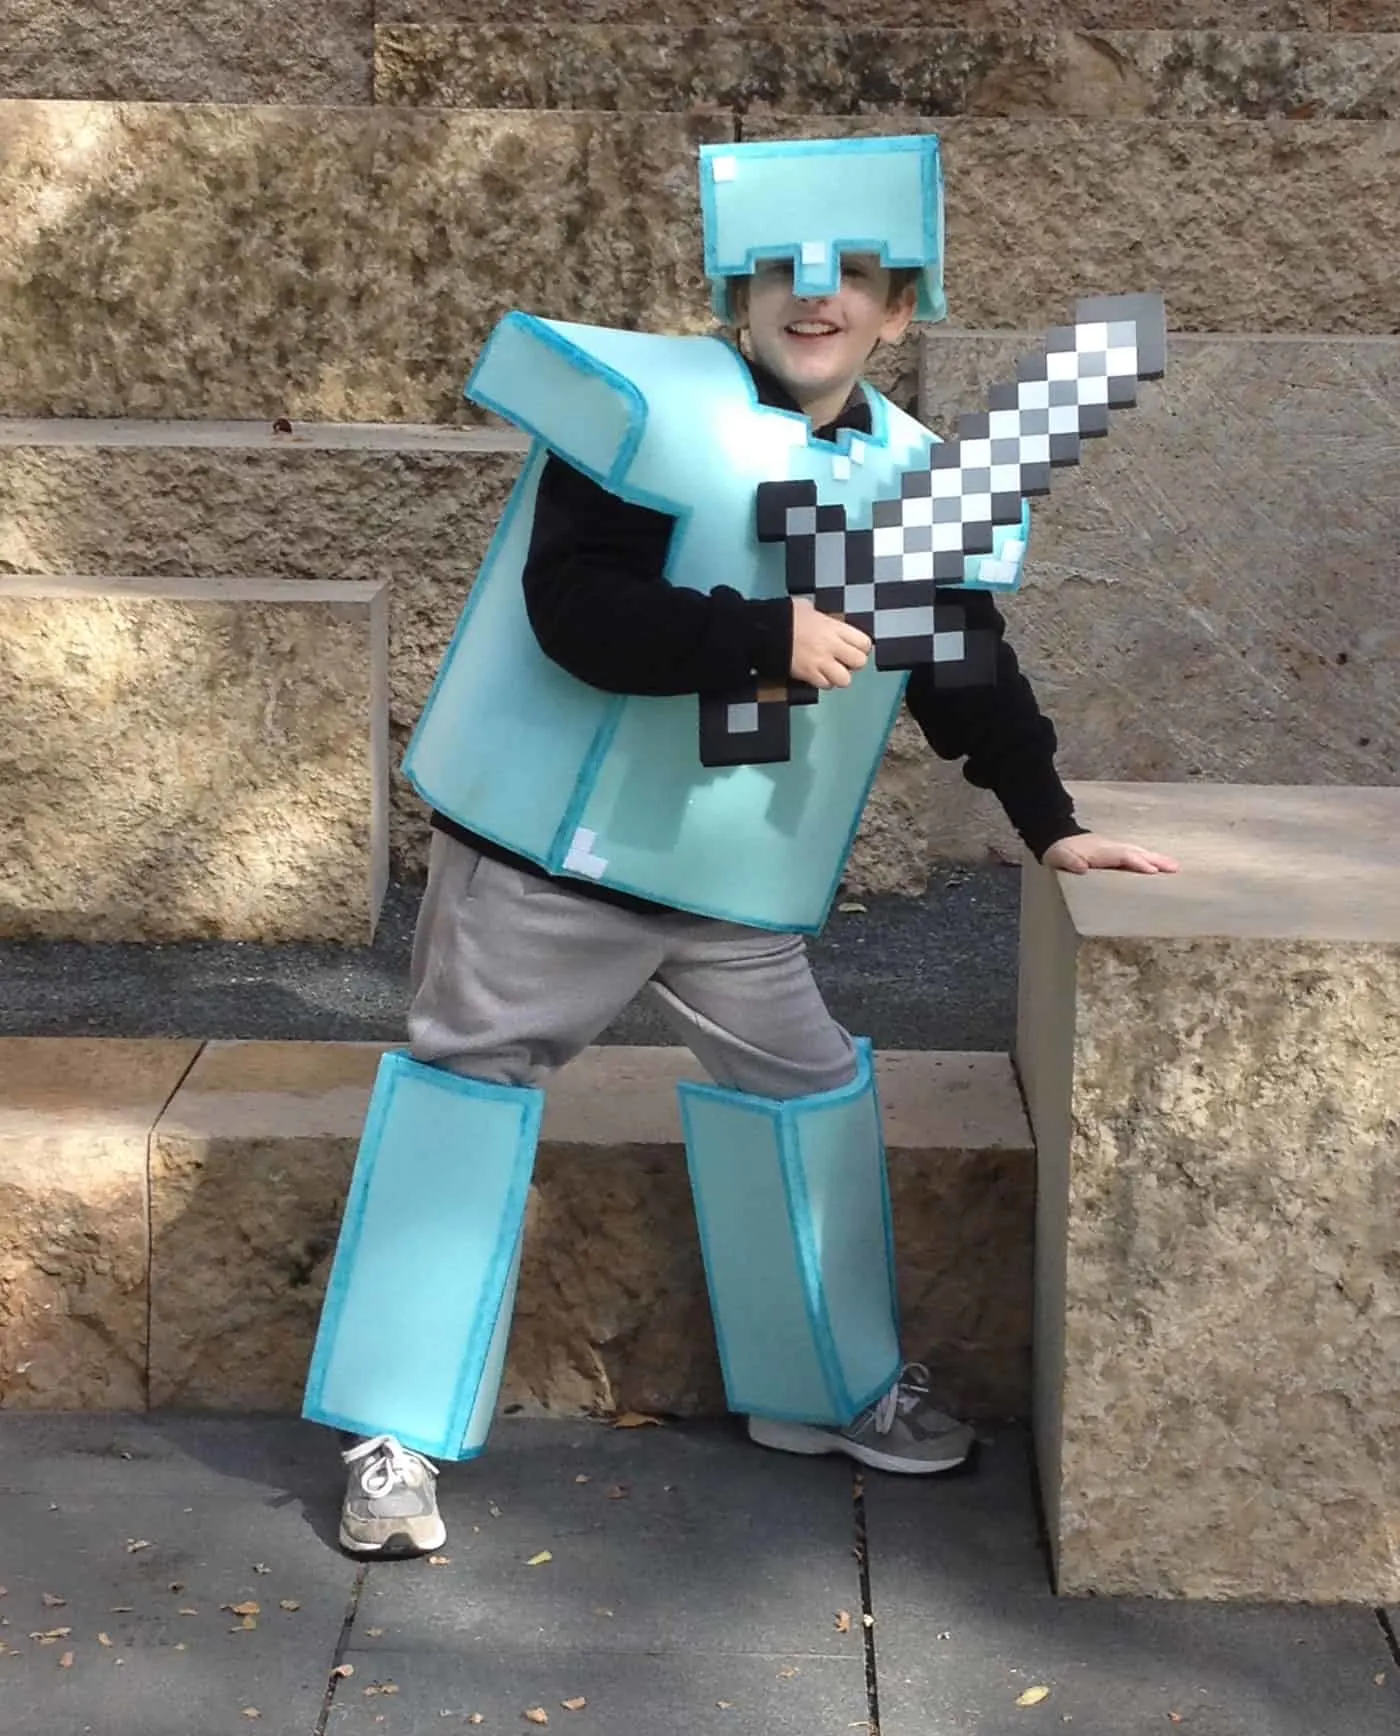
*A mom’s full disclosure on costumes with cardboard heads: Every year I ended up carrying around Mitch’s costume head.We made the cardboard heads as comfortable and super cool as possible, but for some reason little boys like to be able to see when they jump around. And the heads get hot. He would wear the head for photo ops and to greet neighbors on Halloween, but most of the time I was carting his head around! This year we avoided a headless costume by only making a helmet!
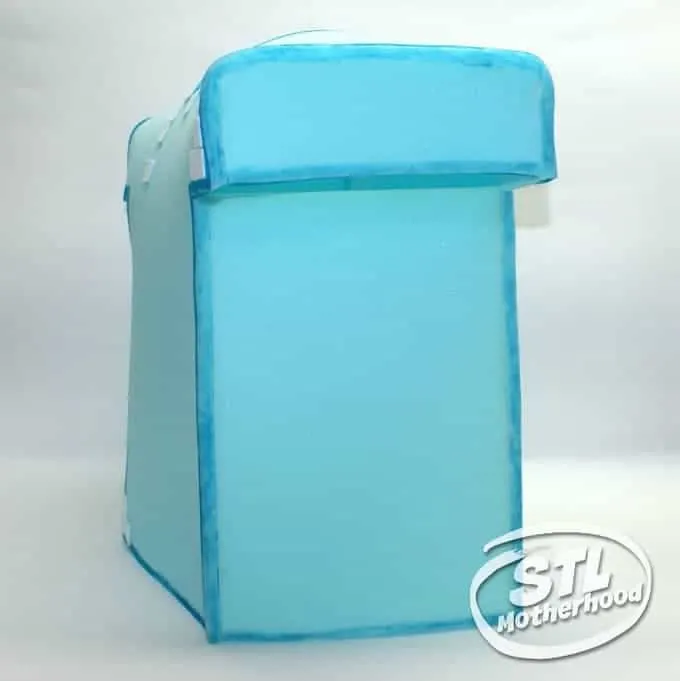
The armor is made from soft and flexible cushion foam, so unlike other DIY Minecraft suits made from boxes, this is a costume you can really move around in and sit down in!

Mitch just wore a plain long sleeve shirt and pants under the suit. If you look closely we tried two versions of leggings–the first was a simple rectangle of foam with elastic to hold it to his leg. That wiggled around too much, so we later built a full box of foam for each leg.
Accessorize your costume with a Minecraft play sword from Amazon. ?
His previous Minecraft costumes were the ever popular Creeper and an Enderman.

Where to find the Foam
You’re looking for “upholstery foam,” which is what you would make cushions from. It’s generally available at fabric stores and some craft departments. We were lucky to grab some in a light blue–the perfect color for “diamond” armor. You can find blue foam on Amazon here.
If you can only find white foam, no worries! Just spray paint it silver or gold!
I picked up a package with 24 x 72 inches of foam, enough to make the helmet AND some chest plate.
One package of foam should be enough to make a helmet and the chest plate, but honestly, I used two packages. But that’s because I’m a messy crafter and re-cut the helmet three times to make it perfect for you guys and Pinterest. Plus, we now have enough leftover to make “boots” or some sort of leg covering.
Lucky for you, I made a template, so you only have to make it once!
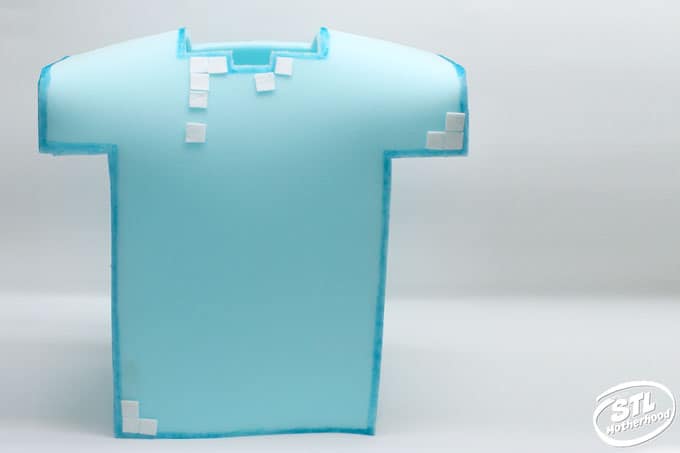
Minecraft Foam Chestplate

Note: When we made this, Mitch was a skinny 8 year old boy who wore a Youth Medium shirt. Your child may need more or less foam–it’s totally scaleable for all ages.
Materials for a Foam Minecraft Chest Plate
- 1/2 inch cushion foam
- White felt
- Box cutter or utility knife
- Scissors
- Light blue Sharpie Marker
- Low melt hot glue & glue gun
- Scrap cardboard for cutting surface
- Ruler
- Your kid’s shirt
Please Note: You can always cut the foam SMALLER. It’s pretty hard to make it bigger! When in doubt, cut bigger. You can always trim it down.
Medium Size Chest Plate
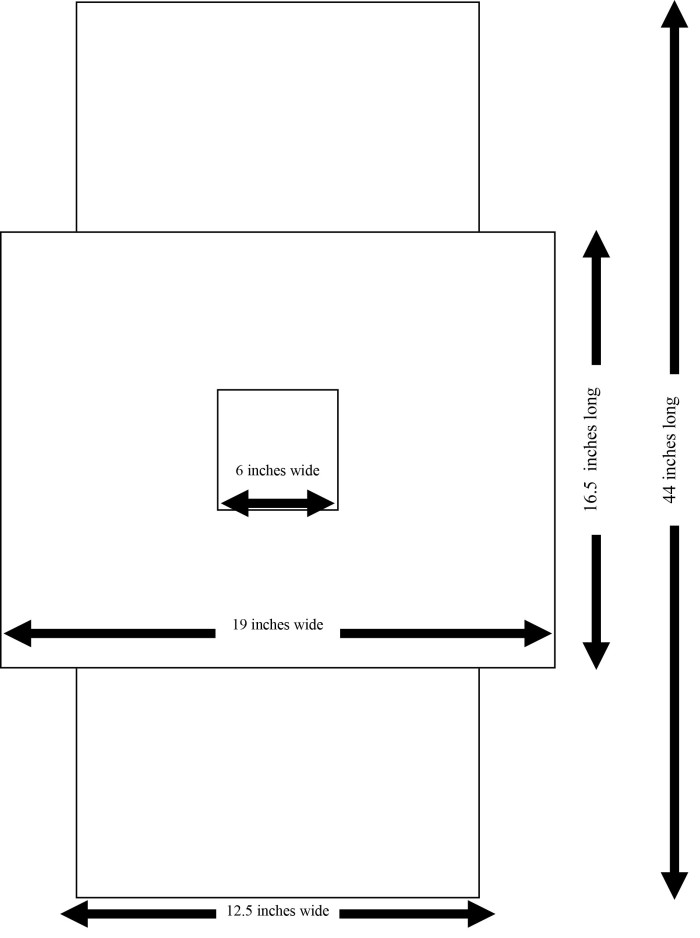

First, here’s a sketch of Mitch’s chest plate. He wears a Youth Size Medium, and it that fits your kid…then just use our measurements and get going!
Now, for the details…this is how I got those measurements. This is handy if your kid is bigger or way smaller and you need to start from scratch.
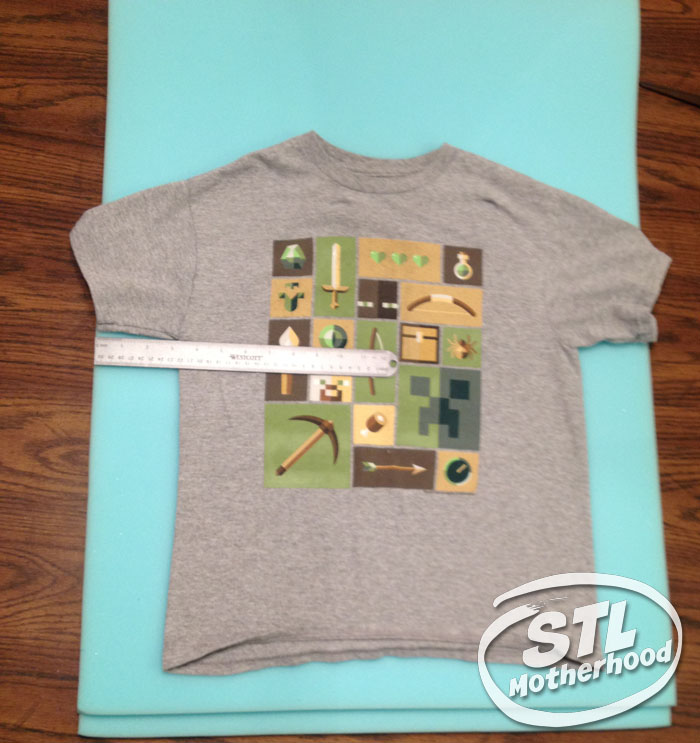
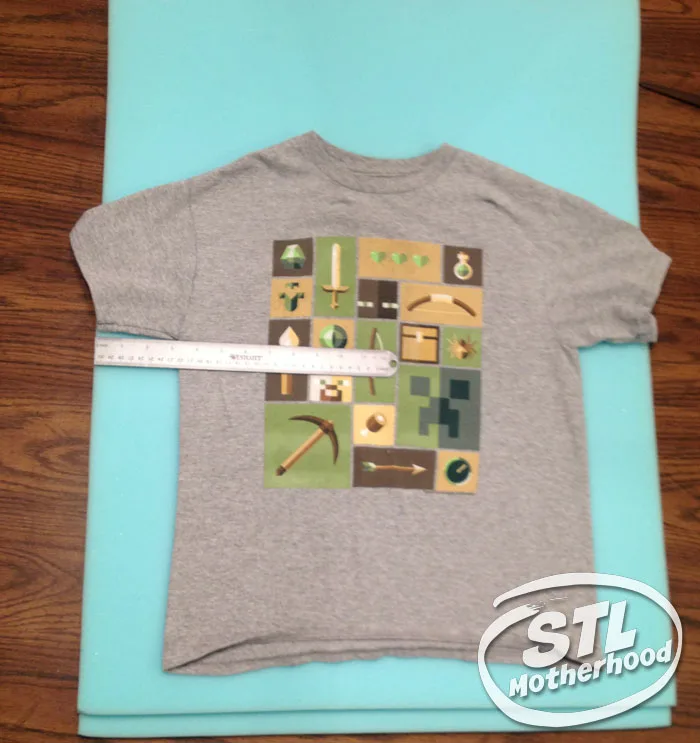
The chest plate is basically a 3D “T” shape, so start by grabbing one of your child’s t-shirts that fits well. Place it on the foam, with the hem at the bottom of the foam. Use the Sharpie to mark the neck opening and the armpits. A couple dots will do it.
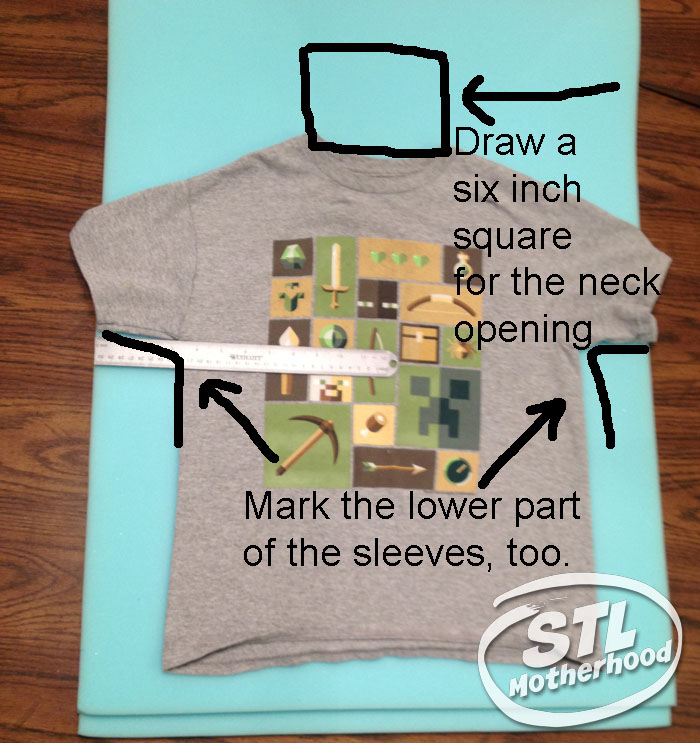
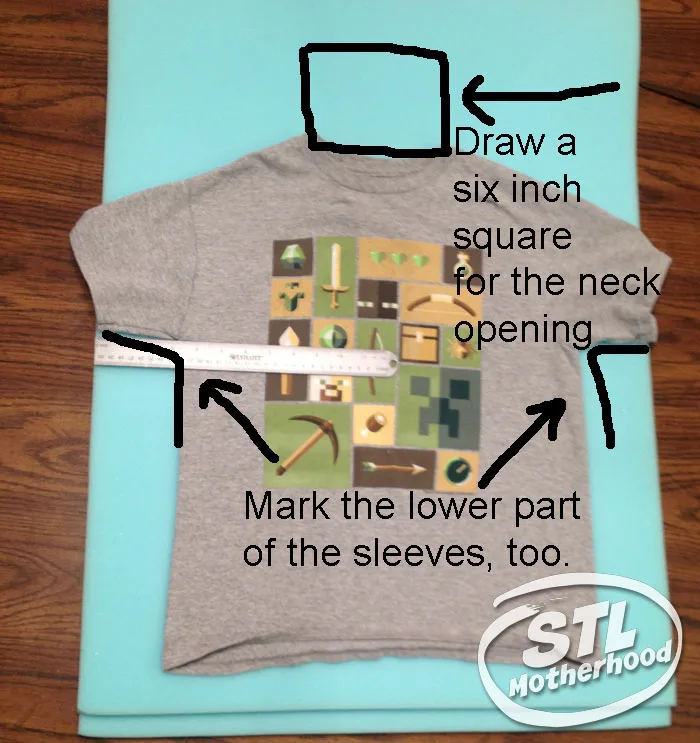
Take the shirt off the foam and lay the whole piece out flat. Use a ruler (or tape measure) and find the center of the foam. Draw a SIX INCH Square for the neck opening. You can use this template: chest plate.
Now fold the foam in half, with the neck opening centered on the fold. Place the foam on a safe cutting surface and trim off the extra foam at the bottom. Open the foam and cut out neck hole.
Grab your kid and place the foam on your child. Now decide how wide the armor needs to be–it won’t be as wide as the shirt! Remember, you’re making a box! You just need a front and back side of the armor right now. Mark the foam where you will trim it down to fit your kid’s torso and sleeves.
For example, Mitch’s armor is 12 3/4 inches wide at his chest, plus 3 1/4 for each sleeve. So, his armor is about 19 inches wide at the shoulder.
While your child is wearing the foam, measure his or her “thickness” for the side panel. Remember, you’re making a BOX so measure the child’s thickest point so the foam will not curve around his or her shape.
Remember to leave a little wiggle room for a jacket underneath the armor if you plan to wear this Trick or Treating in chilly weather.

Mitch (again, a size youth medium) has a side panel of 9 inches.
Cut the side panels from the extra foam.
The side for the sleeve was more interesting to calculate. It will be the same width as the torso side panel. I found the height by measuring the sleeve while flattened out, then subtract 9 (the width). Divide that number by 2 and you have the height of your sleeve. The panel we used was 3 inches tall, by 9 inches wide.
Use the low temp hot glue gun to glue the pieces together. Glue just one seam at a time.
The Finishing Touch
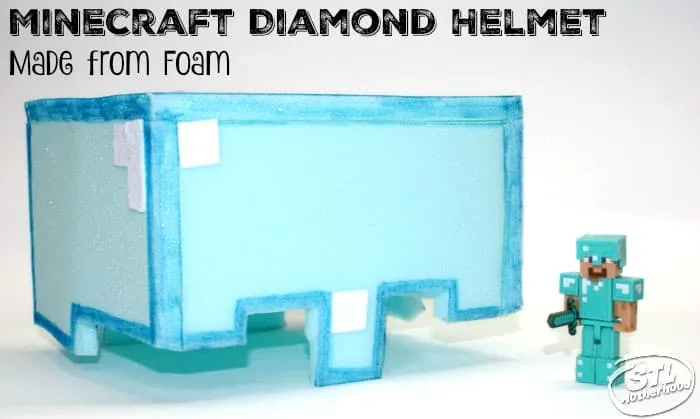
Once the glue has time to set–just a few minutes with hot glue–add the blue outline to the outside edges. This makes the armor look more Minecraft like and camouflages any rough cuts in the foam. Decorate with squares of white felt to add the “sparkles.” We used a Minecraft action figure for inspiration, but Mitch just stuck the felt on where he thought it looked best.
Make a Minecraft Helmet

Materials for a Foam Minecraft Helmet
- 1/2 inch cushion foam
- White felt
- Box cutter or utility knife
- Scissors
- Light blue Sharpie Marker
- Low melt hot glue & glue gun
- Scrap cardboard for cutting surface
- Ruler
- Template
The template we made fits both me and my son, a 3rd grader. If your child’s head is smaller you can either scale it down, or insert extra strips of foam to the inside for a perfect fit.
We used a Blue Sharpie Marker because Mitch wanted a DIAMOND helmet, and it will be used for highlights, as well as tracing the template. If you plan to paint your helmet, go ahead and use a black marker. You don’t want any black marks showing on your finished helmet, so use care when cutting. Blue marks will be colored over later.
First, here’s the template: Minecraft Diamond Helmet Template
The helmet is 8.5 inches square on the top, so not all the edges will show on your printable when you use 8.5×11 computer paper. This also means you have less to cut! Print the template and cut out.
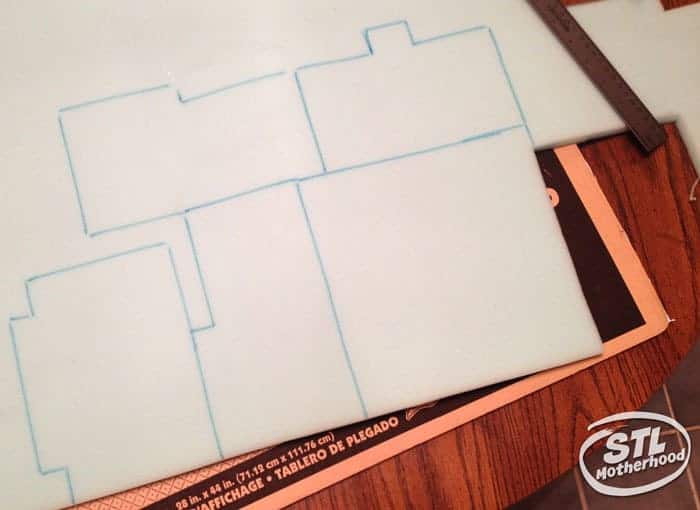

Place the foam on a clean work surface. Arrange the template with the sides close together and make use of those edges!Trace the template with the BLUE Sharpie Marker. Remember to make TWO sides.
Place scrap cardboard under the foam to protect your table and carefully cut the pieces apart with a sharp box cutter.You’ll want a VERY sharp, fresh blade for this to avoid tearing the foam. You can use scissors, but it will be difficult to keep your edges clean.
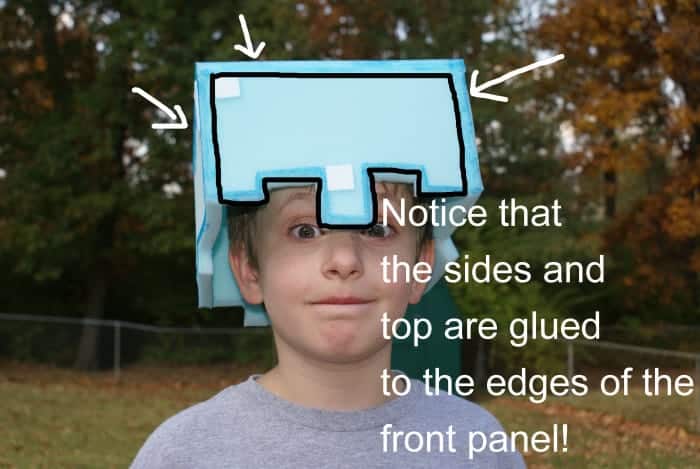
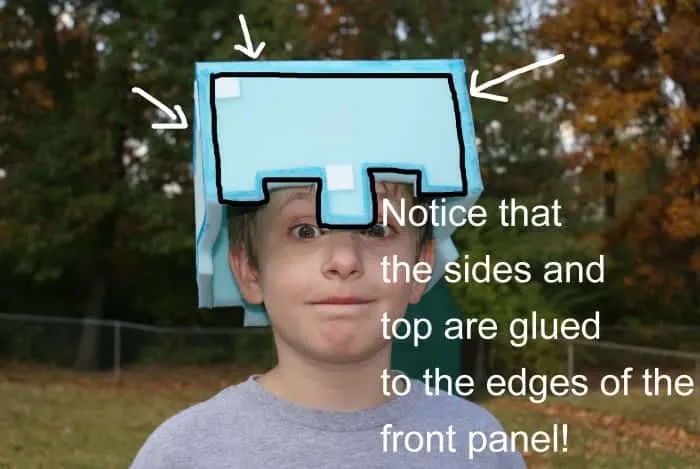
Practice putting the helmet together without glue. Is everything straight? This is the best time to make adjustments. Please note that the front and back panels are inset, you won’t see the edges.
Heat up your LOW melt glue gun. Don’t use high melt for this project, you’ll just melt the foam.
Run a bead of glue along the edges and stick together. Glue ONE edge at a time. Press the foam together while it cools.You’ll have a few moments to wiggle the pieces into place, then it will be a permanent bond. Low Melt glue does NOT need any time to cure. You can wear this helmet seconds after it is glued together!
Once the helmet is glued together, use the light blue Sharpie to color the edges of the helmet. This will camouflage the rough edges and make it look more authentic.
Cut small squares (about 3/4 inch) from the white felt. Hot glue in place, creating the Minecraft highlights you see in the game. We used a Steve action figure as our model.


Need another great idea for a Halloween costume? I’ve got 31 No Sew Halloween Costumes right here!