Confession: I still have a tiny Star Wars poster I made with Shrinky Dinks when I was 12. I traced it off a post card sized Star Wars poster. It was soooooo cute.
Yeah, I love Shrinky Dinks. And I still do. Shrinky Dinks are harder to find these day, but well worth the special trip down the craft aisle to find them! Mitch and I have been messing around with Shrinky Dinks the last few months–and have we figured out something super cool to share with you! We’ve made…drumroll please…
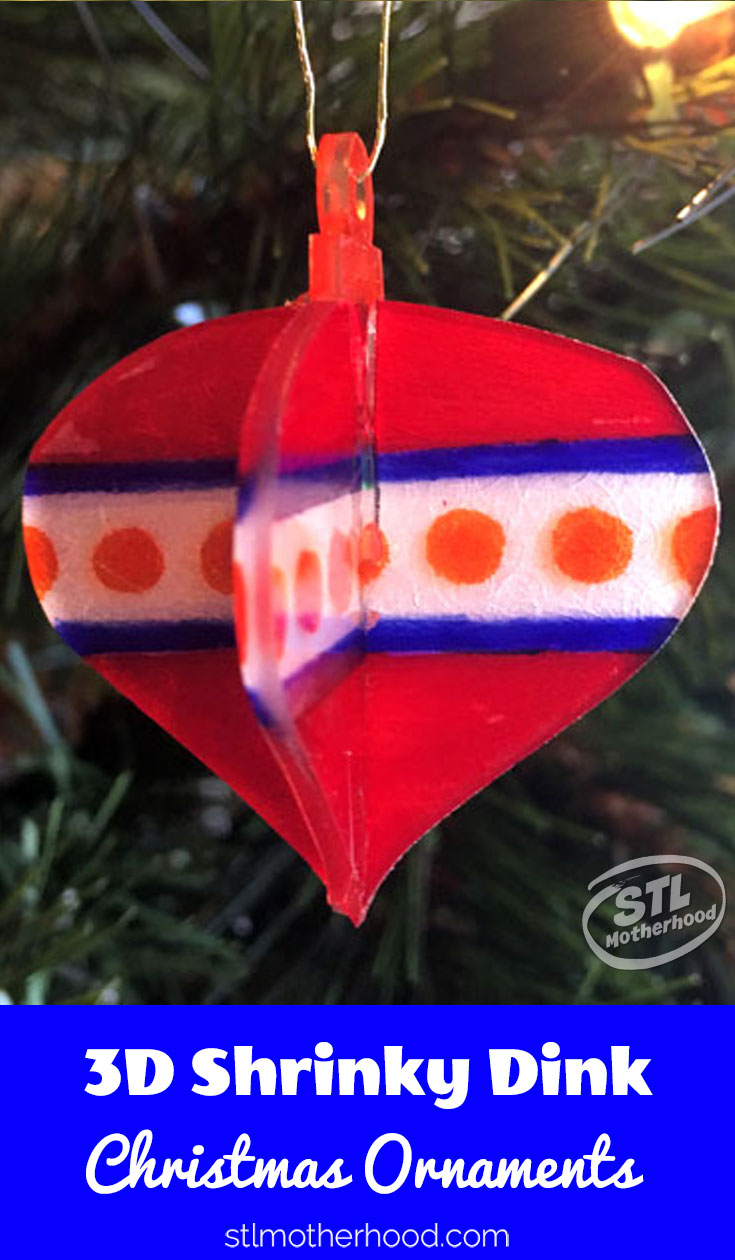
3D SHRINKY DINKS
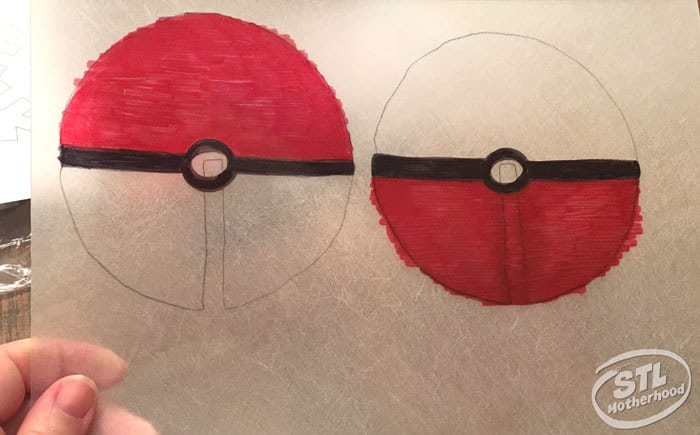
So here’s the trick: You make two identical Shrinky Dinks, then put a 1/4 inch wide channel in each, down the middle. When your art shrinks up, this channel will be the thickness of the plastic, allowing you to fit the two pieces together.

I’ve included a few templates to help you make your first 3D Shrinky Dinky ornament. After you’ve made one, it’s pretty easy to create one from scratch! My templates were based off of PicMonkey clip art if you want to go make something different. You can also free hand a design if you don’t have a printer–a jar lid makes a great template for a round ornament…or a Pokeball!

Tips to Make 3D Shrinky Dink Ornaments
- Permanent markers work best–they have awesome bold colors. We have a collection of Sharpies just for our art projects.
- If you’re using “Frosty” shrink material, be sure to color BOTH SIDES. Your design won’t show up well on the reverse side, so flip that plastic over and color both sides!
- Include a hole for string or an ornament hanger BEFORE shrinking.
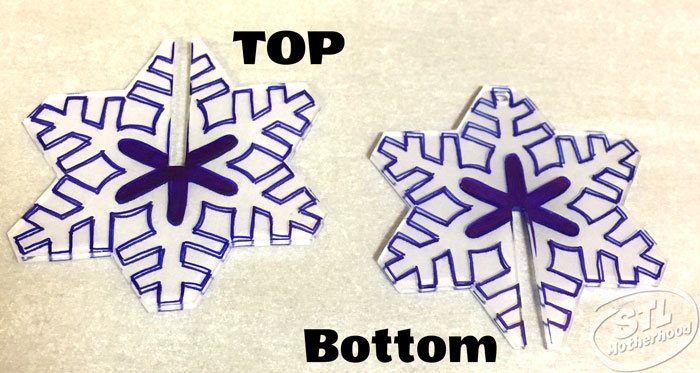
- The slot needs to be in the TOP of one piece and the BOTTOM of the other piece.
- The slot is 1/4 inch wide before shrinking and goes to the center of the ornament.

- You can test fit the pieces BEFORE shrinking to see if your slot goes the the middle.
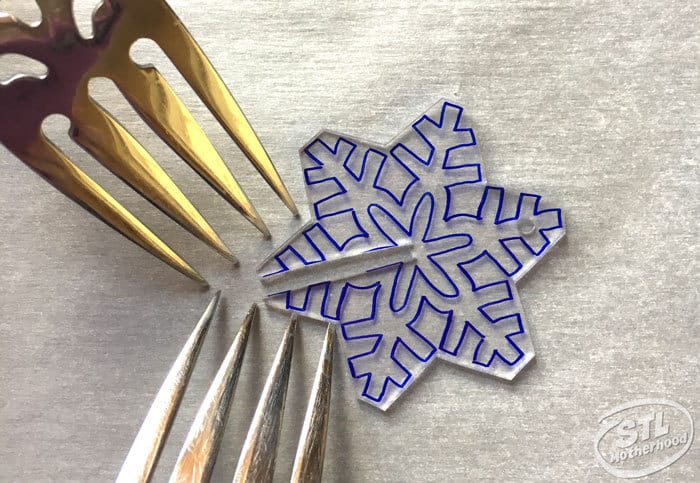
- If the slot is not a perfect rectangle when you take it out of the oven, you have a few (30??) seconds to fix it. Take two forks and push the gap closed. A snug fit will make the ornament look better.

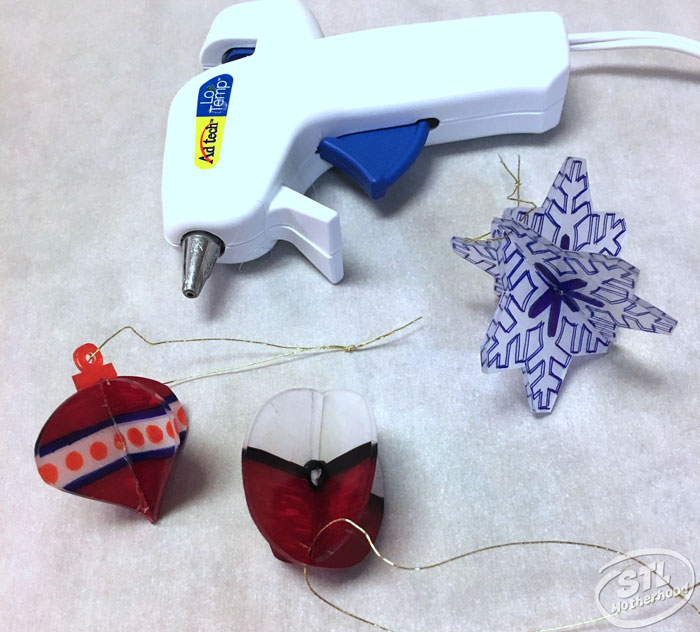
- You should add a string to your ornament before gluing if the hole will be blocked by the 2nd piece, like in the snowflake I made.
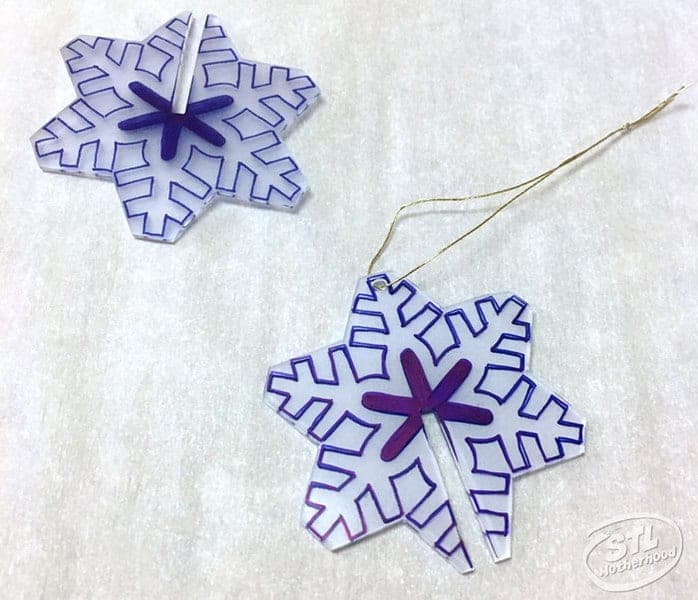

- Glue the two pieces together with hot glue or some other clear drying glue for the best results. You just need a dab in the center to hold it.

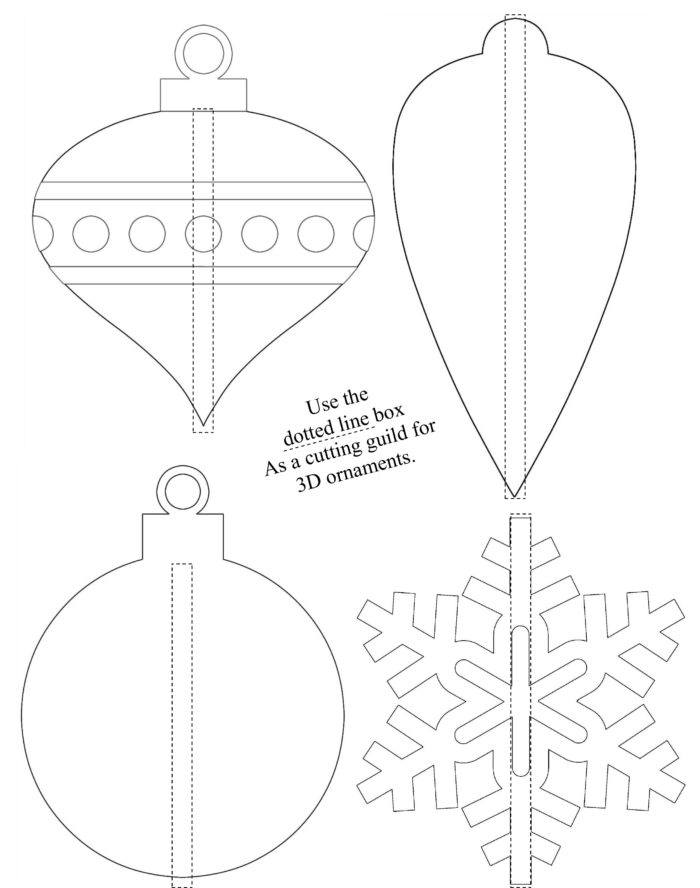
Template for 3D Shrinky Dinks
Just right click the template, save and print!
Since I only made one image for each design, use the dotted box as a GUIDE for placing the slot. It needs to go from the bottom to the mid point on one, and then from the top to the mid point on the other. For the ornaments with the decorative loop on the top, I only traced it on ONE piece. I just rounded off the top of the second piece.