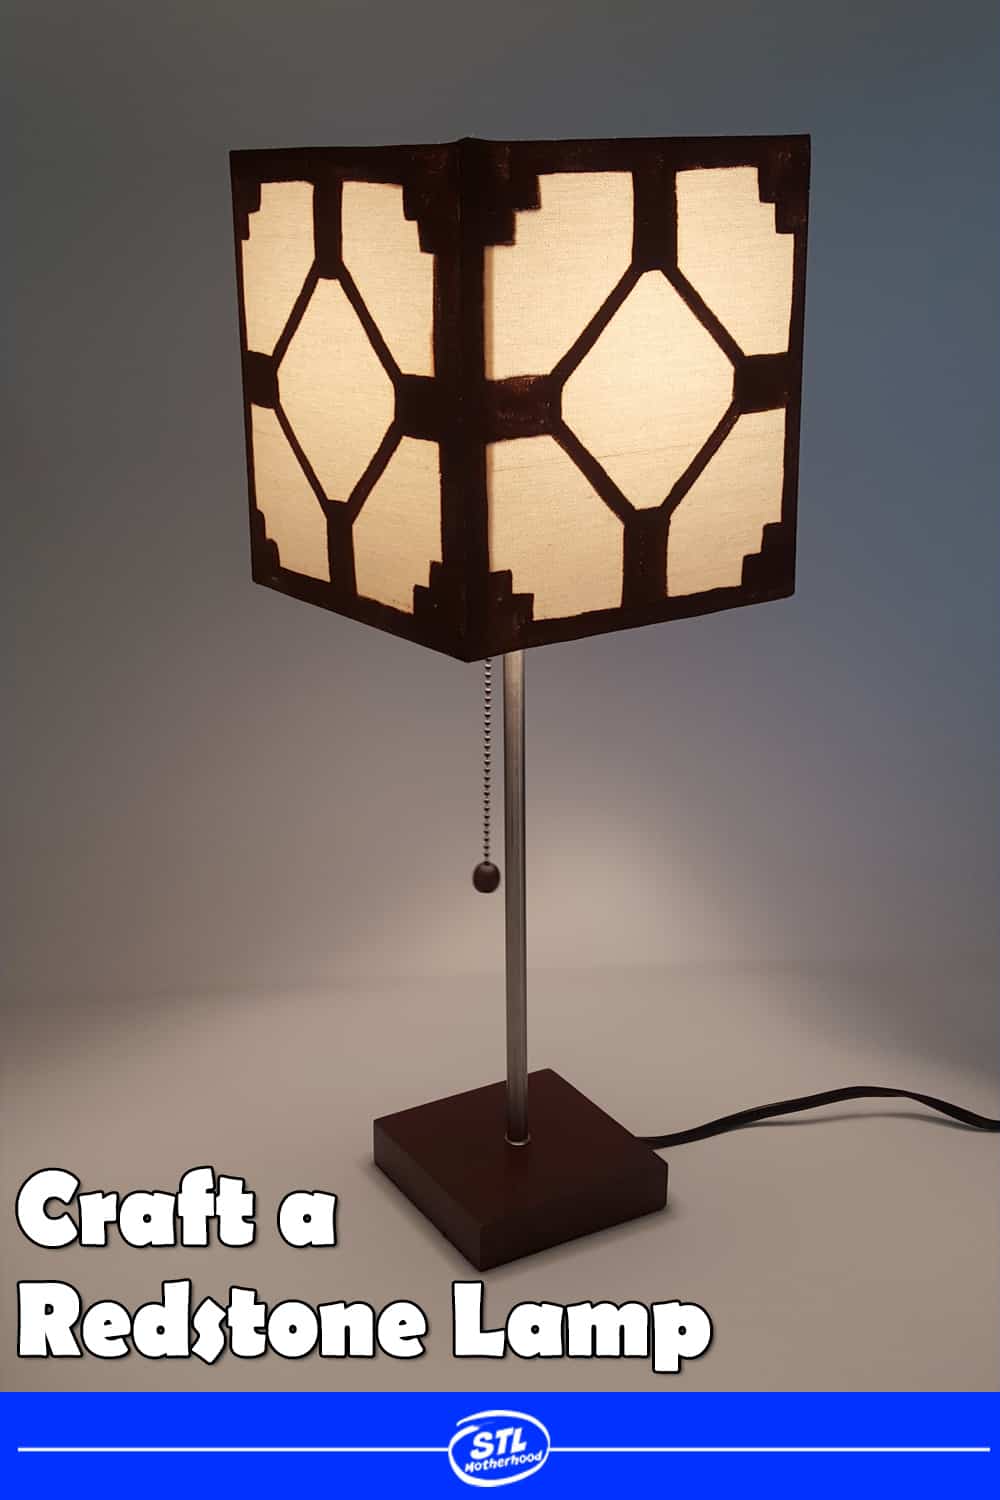
Last week I told you about a Minecraft toy shelf we made for Mitch’s room…now he’s got a proper bedside lamp! A redstone lamp! I’ve been wanting to make this for him for ages, but I only recently found the perfect lamp for the job.
Do you want your child to NOT look like a Noob on server? Looking for a decent family friendly server? Then I’m here to help!

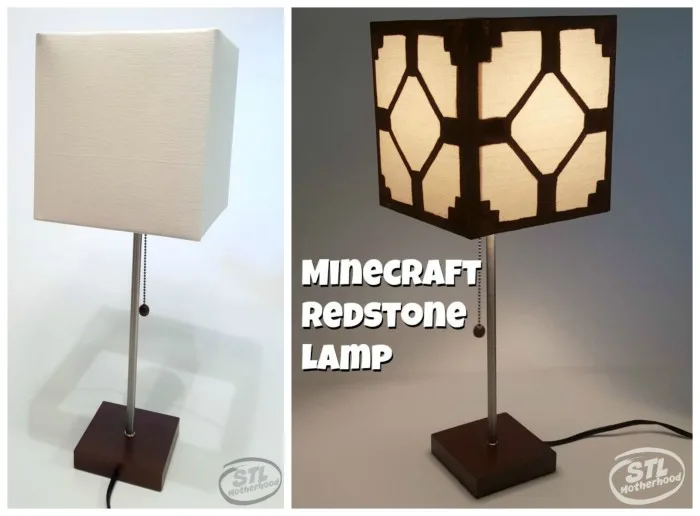
I found the lamp at Target for $24 bucks! It’s perfect, a nice plain lamp, an easy to use pull cord and an nearly perfect square shade. Nearly perfect, because after I measured it, I found the shade was 7.5 x 8 inches. Close enough!
(If you can’t find this lamp, try Amazon. There’s a square shade here that you can put on any table lamp.)
You might have noticed that I like to keep my crafts simple. I made the lamp by tracing a redstone lamp pattern onto the shade and then painting. Boom. Done. You’ll need a steady hand to paint a fabric lamp shade, so this craft is one you might let an older kid try or just do it yourself for your kid.
Redstone Lamp Crafting Directions


First, I found a Minecraft Redstone lamp block and pulled it into Photoshop. I traced it, and made it black and white. Mitch and I had been looking at other people’s redstone lamp projects and decided to make ours more on the “real” side, so we smoothed the central diamond pattern. This also made it easier to trace and paint. Click the image below and you can print either version.
If you’re curious where I found the Redstone lamp block to copy, it was on some random player’s forum post. But the resource pack is called R3D Craft: Smooth Realism, if you want to find it and play it on your computer.
Next I sized the template to match the real lamp: 7.5 x 8 inches. The template I’m sharing is 8×8 inches, so you’ll need to size it to fit your lamp. I just squished it a little to make it fit.
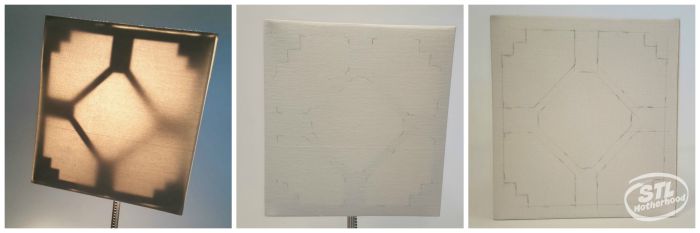
Then I trimmed the paper and stuck it inside the lamp shade and turned the light on. I didn’t bother with taping it down, I just held it in place while I carefully traced the pattern in pencil. Since I had a lot of tracing to do, and I wanted the pattern to stay nice and straight, I just traced the corners and middle bits of the pattern. After getting all four sides traced, I took the shade off the lamp and completed the lines with a ruler. Be careful with your marks, the pencil is difficult to erase off fabric!
Now came the fun part! Paint! I used regular brown craft paint and a fairly wide brush to fill in the pattern. You’ll need to be careful here, since the only way to correct to a mistake is to make the lines thicker! (Not that I know…)
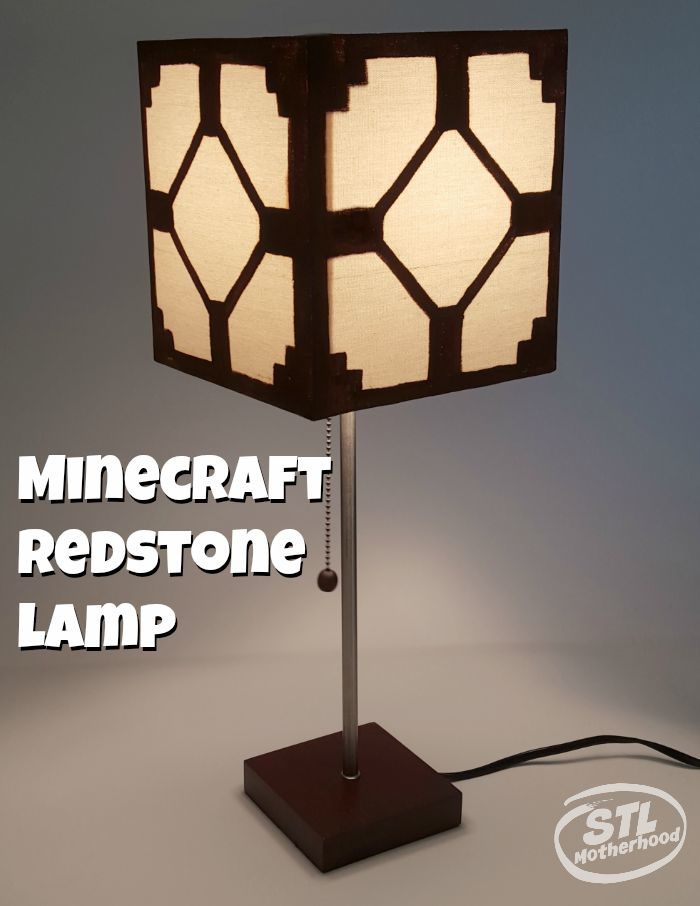

All in all, it took me a few hours one afternoon to complete the lamp. It’s not perfect–I’m not a good enough painter to sell these on Etsy, but Mitch said I did a great job! And that’s all that really matters in this case.
Note: I considered using Sharpie to make it even easier, but I quickly found out that even a Sharpie bleeds on the fabric. Yikes! A fabric marker might be ok, but I’ve never had a lot of luck with those. Since this won’t be washed, I’m thinking the regular acrylic craft paint will do the trick.
More Minecraft Craftiness!
Make a Plush Slime & Magma Cube
Make a rolling Minecart for your action figures
Be a Creeper with this great Costume
Make Paper Minecraft Action Figures
Merry Minecraft Ornaments
Real growing Grass Blocks for your window sill
Minecraft Spawn Eggs to Decorate and Play